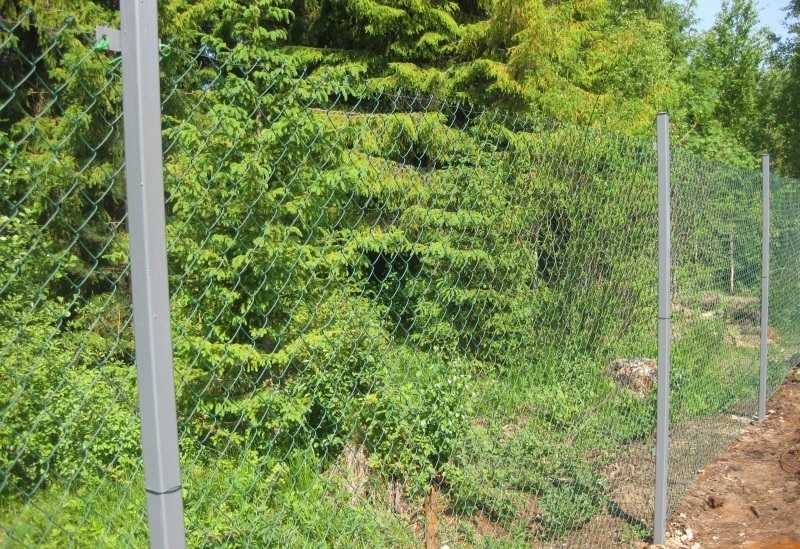
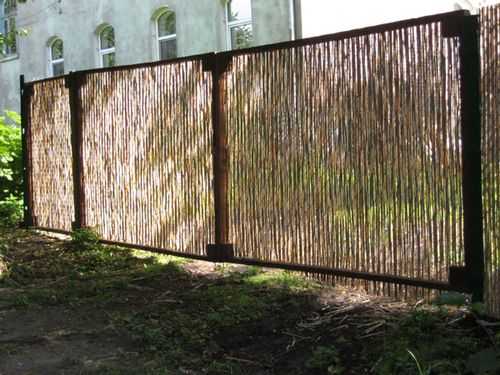
GOSTs normalize a lot, including how it is possible or impossible to delimit areas. So, for example, the regulations prescribe to delimit neighboring areas with transparent fences. Since the boundary is usually long, it is desirable that the fence be inexpensive. Actually, the choice is small - a chain-link fence or. Wattle, although cheap, is extremely short-lived, so that only a mesh fence remains. In general, it is correct to say “chain-link fence”, but for the ear it is more common to incline the name.
Popular and inexpensive - chain-link fence
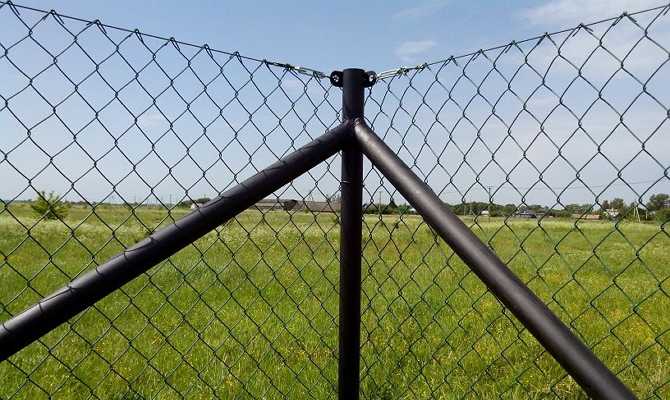
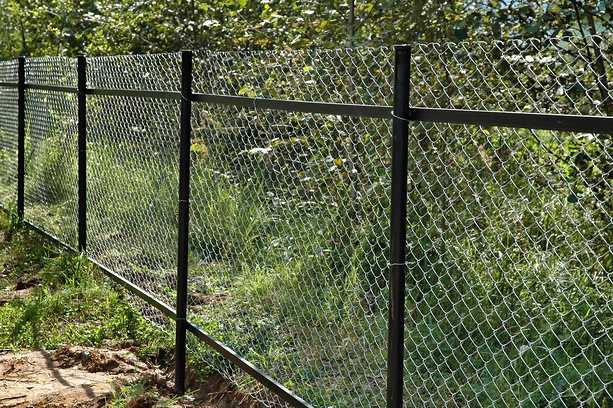
Whatever this fence is called, it has a solid number of positive aspects. The first and important plus is cheapness. This applies to both the filling itself - the grid, and the rest of the structure. To stretch the grid, the foundation is not required. It is enough to drill holes for about a meter, insert a pole and, having fallen asleep rubble, compact it well. Everything, no concrete work. On most soils, this installation method for this filling works for "five".
Structures and installation methods
The fact is that the chain-link fence is light. Moreover, it is light both in terms of its own weight and in terms of perceived wind loads. No matter how strong the winds blow, the pressure transmitted by the net to the poles remains negligible. Due to the low weight, such a technology for installing pillars can be used: in a hole, under filling with sand or gravel, without concrete. Moreover, such a fence stands without problems even on heaving clay soils with a high level of groundwater, and even with a large freezing depth.
Without guides
Here's how it works. We are talking about the simplest design: just pillars, between which a grid is stretched. As you can see, the pillars are buried to a depth of less than a meter. What happens to such a fence on soils that normally drain water? All the water near the column goes down through the sand or gravel to the bottom of the hole. There it leaves in a natural way - it seeps into the underlying layers. Even if frost hits and the sand or gravel around the post freezes, the moisture content is not enough to have at least some significant effect on the post.
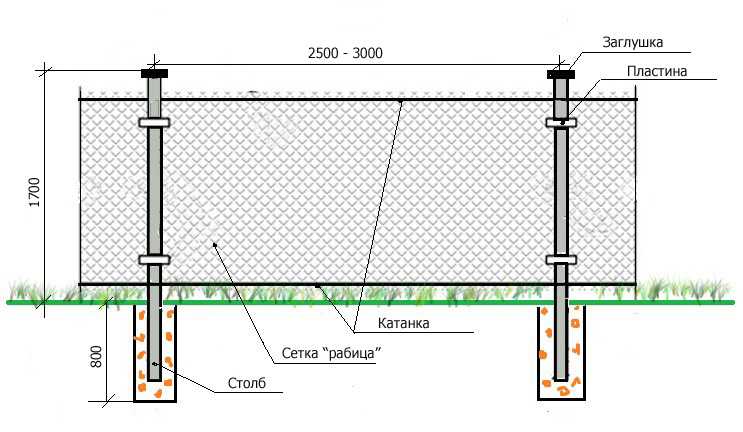
On clays and loams, you can use the same principle, only it is necessary to fill it with gravel. And be sure to pour 10-15 centimeters of gravel at the bottom of the hole, and only then install a pole. What happens in this case. Water still accumulates at the bottom, but it leaves very slowly. It may well happen that by the time of freezing, the rubble will still be wet, or even be in the water.
What will happen then? It will freeze and become hard. But since the soil also freezes, it puts pressure on the rubble. The forces are considerable, and the ice breaks, the rubble becomes mobile and compensates for most of the pressure created by the ground. As a result, if there are movements of the pillars, then they are quite small - from a few millimeters to several centimeters. Since the design is not rigid, the mesh will easily transfer it without any harm. After everything thaws, the poles will lower into place. But such a scenario is only if they are placed perfectly vertically. Otherwise, the poles may tilt and you will have to fix everything.
With guides (legs)
Sometimes, in order for the fence to be more solid and keep its shape better, two longitudinal guides are attached to the posts. They can be from a pipe, or they can be from a bar. Wood, as a plastic material, will tolerate soil movements remarkably, but a welded pipe will create additional difficulties.
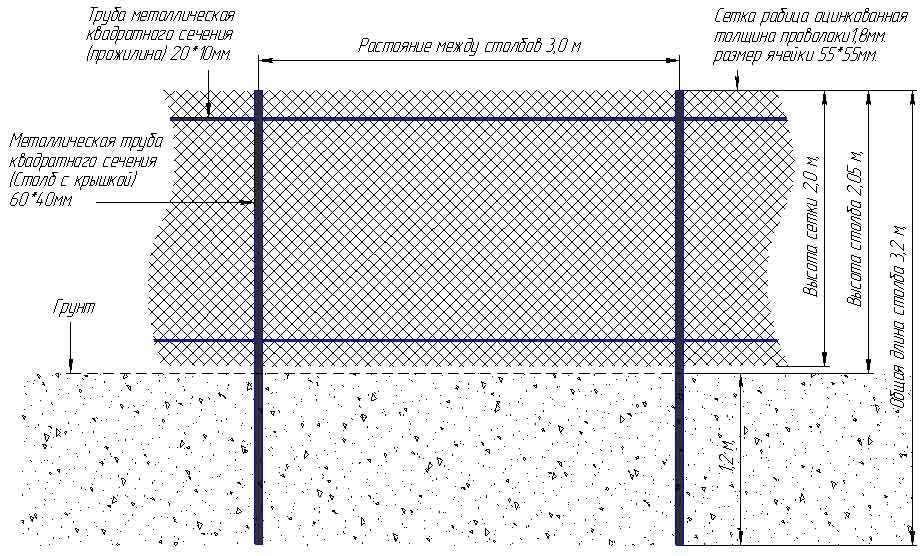
The degree of rigidity of such a fence is higher, and when heaving, if the posts are squeezed out, it is quite possible that in some places the pipes may be torn off. To prevent this situation, you will have to dig below the freezing depth in your area. Everything else remains in effect: the hole is 15-20 cm deeper than required, there is rubble at the bottom, then a pipe is inserted, covered with well-compacted rubble.
Sectional
There is another design of a chain-link fence. Frames are welded from the corner, on which the mesh is then stretched. Finished sections are welded to exposed poles.
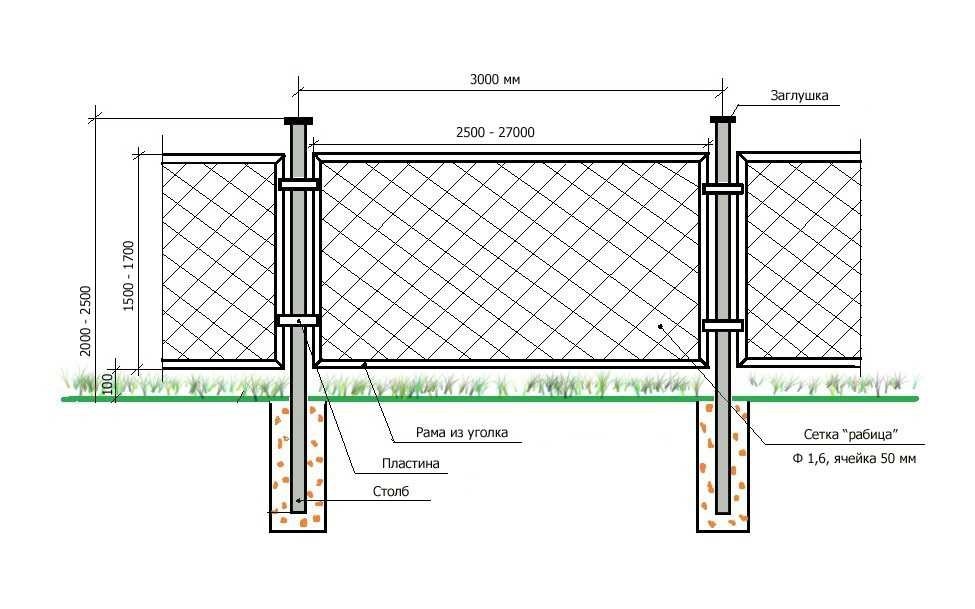
As you can see from the description, the design is also quite rigid. This means that on heaving soils (clay, loam) it is necessary to bury the pillars 20-30 cm below the freezing depth of the soil, but it is also desirable to do without concreting. If you fill crushed stone with concrete, the probability that the pillar will “squeeze out” increases many times over.
Types of chain-link mesh for a fence
Even such a seemingly simple material as a chain-link mesh can be different. Moreover, the difference is solid both in price and in service life.
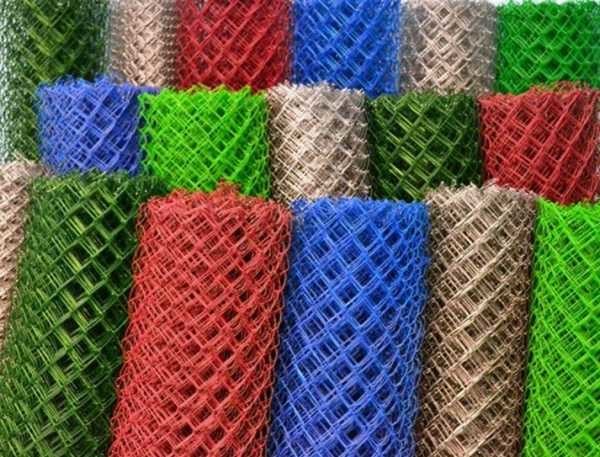
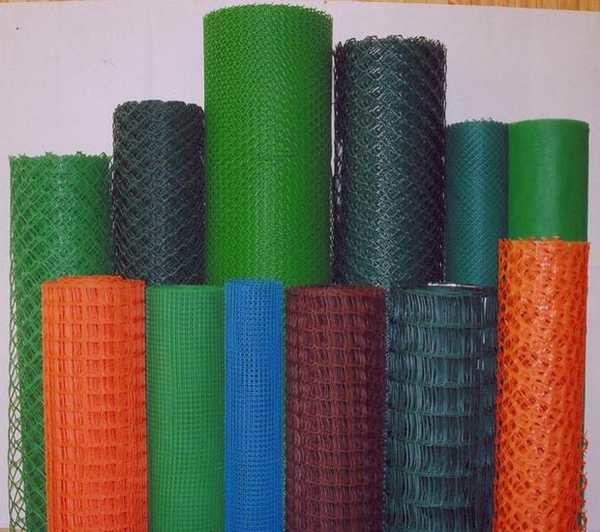
Plastic or polymer mesh - 100% polymer
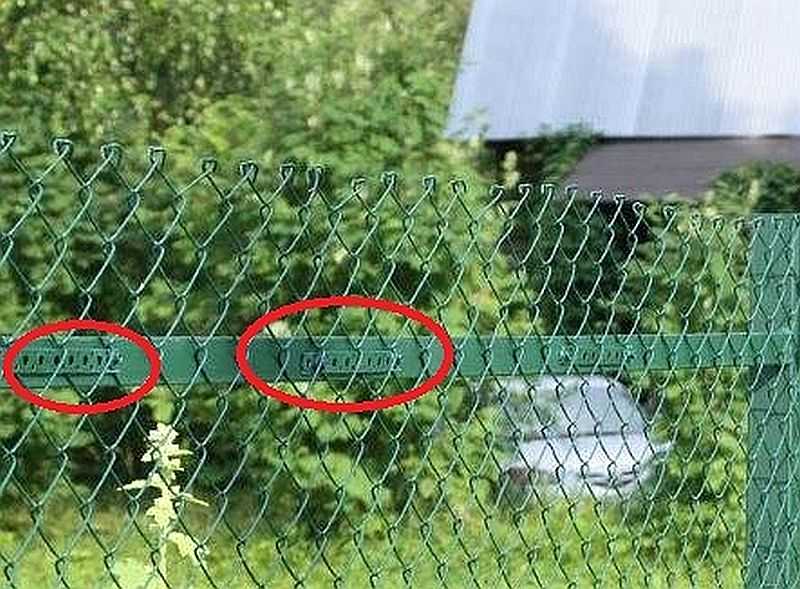
In addition to different materials, the chain-link has a different cell size. It varies from 25 mm to 70 mm. The larger the cell, the cheaper the mesh, but the lower the bearing capacity it has. If you put a chain-link fence on the border with a neighbor, they take mainly the middle link - from 40 mm to 60 mm.
What to look for when choosing a grid
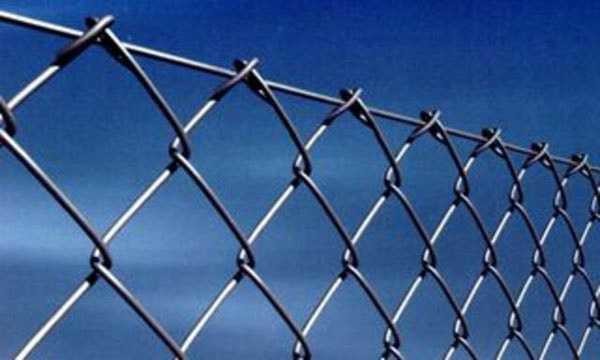
Carefully inspect each roll. Its edges should not be curved. The upper and lower cells should be with curved "tails". Moreover, it is desirable that the length of the folded part be more than half the length of the cell. This mesh is easier to pull.
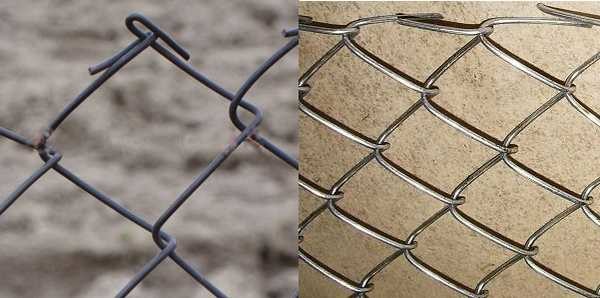
Edges should be straight and folded
Pay attention to the thickness of the wire, how even the cells are, how ugly they lie. All deformations are a sign of low quality.
If the mesh netting is in a polymer coating, check the warranty period given by the manufacturer. The cheapest ones, not only do the wire often bend, they also use ordinary plastic, which, under the influence of ultraviolet radiation, becomes brittle after a couple of seasons and begins to crumble. A normal coating can last up to ten years or more. Therefore, in this case, it is not worth chasing cheapness.
Which poles to use
There are several options:
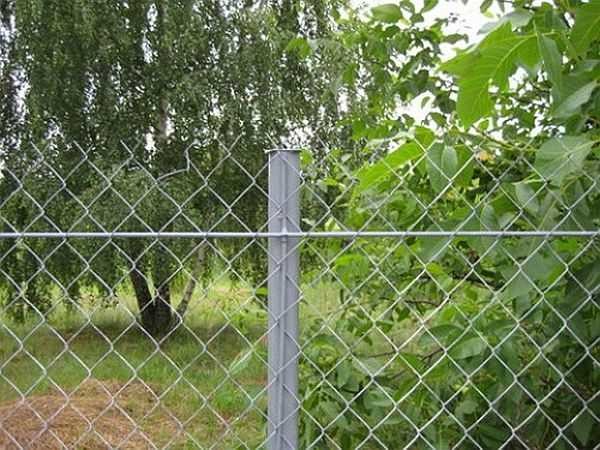
The most convenient option of all these is a profile pipe, and better - a rectangular section. It is easy to attach the mesh to it, and you can weld hooks or wire if necessary. If possible, put them on. The optimal section for the post is 25 * 40 mm or so. You should not take a larger section - the fence is light.
The order of installation of pillars
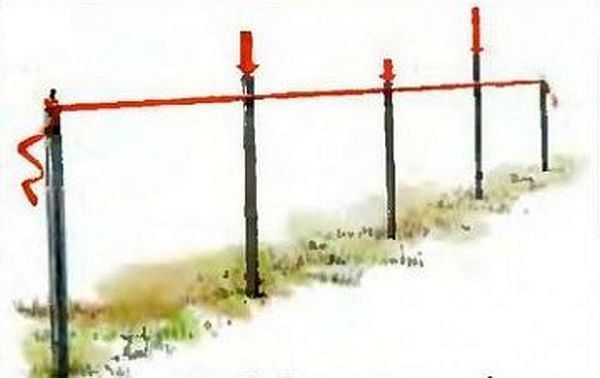
First, put up the pillars at the corners of the site. If only one side needs to be fenced, one pole is placed at the beginning, the second at the end. Their verticality in all planes is strictly checked, the height is adjusted. At the very top and 10 cm above ground level, two cords are pulled. The rest of the pillars are placed on them. The height is aligned along the upper lace, the lower one serves to facilitate orientation: by attaching a plumb line to a point on the upper thread, you can find the place where the hole will be drilled.
The installation step of the pillars is 2-3 meters. Less is too expensive, more is pointless, the mesh will sag. When installing mesh without a guide wire, it makes sense to put posts every 2 or 2.5 meters. This makes it easier to stretch the mesh without sagging. For other models - with wire, slides (guides) or sections - the step can be 3 m.
If the grid is stretched between the posts, the extreme ones have a considerable load. so that they are not "led", they put jibs. They are exposed, dug in, welded to the installed pole.
Netting net installation
It only seems at first that it is easy to put up a chain-link fence. As soon as you start thinking about how to fix the net on the pole, how to stretch it, everything is not so obvious and simple ... First, about the general rules. The mesh is attached to one of the corner posts. Fasten in at least four places. In principle, you can simply fasten it with wire, passing it into the cell.
The method is simple, but not the most reliable. If the fence is in the country, during the absence of the owners, the grid can be easily removed and carried away.
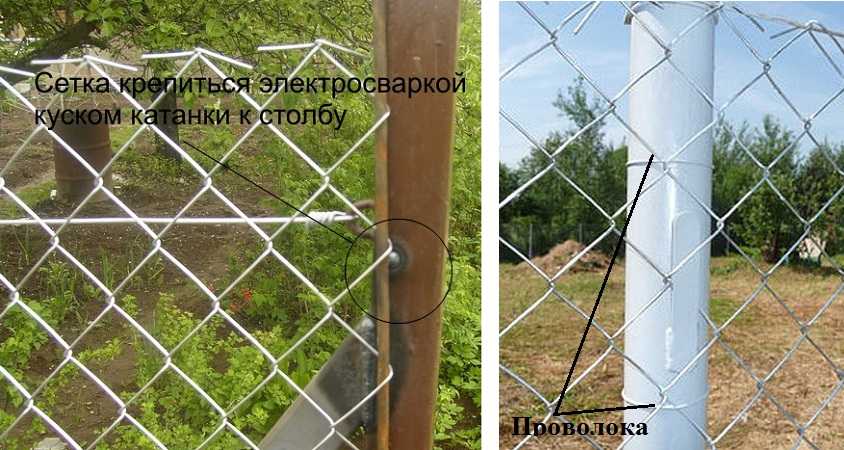
You can at least fix it more securely on the first and last pillar. To do this, take a steel bar with a thickness of at least 4 mm, thread it through the cells, weld it to the pole, grabbing every 40-50 cm (in the photo on the left).
Another way: weld three or four rods with a diameter of 6 mm to each post. A mesh is put on them, they are bent.
If you are still paranoid about the fact that I will remove the grid, you can drill two through holes in the post, insert a rod bent in the form of a horseshoe - U, grabbing the grid with a “back”. On the side where the ends come out, twist them and rivet them, or weld them.
Stretch
There is another problem: how to stretch the grid. If the design is simple - without slegs (transverse guides that are fixed between the posts), you can simply stretch the grid from one post to another. Just note that it is necessary to fasten sequentially to each pole. Fastening first through one, and then intermediate ones is a bad idea: there will definitely be uneven tension and sagging.
How to stretch the chain-link mesh so that there is no sagging? Insert the rod, grab it and pull with all your weight. The stretch will be quite significant. It is necessary to work with an assistant: one pulls and holds, the second fastens.
with wire
This type of fence is good because it is put up quickly. But the top edge may sag. If someone climbs through it, the top will definitely jam. It's unlikely to straighten it out. So that the top does not sag and “wrinkle”, a wire is pulled through the first row, it can be steel, or it can be in a plastic sheath so that it does not rust.
If wire is used, the technology can be simple: make a loop at the end, throw it over the last post. They unwind the wire trying to pull it, after two or three pillars make another loop, wrapping the wire around the pillar. So until the end of the flight. With the use of muscle strength, it will not be possible to pull enough, and the wire will inevitably sag. This is easy to fix. Take a thick metal rod, and use it to twist, pulling the wire. Is one twist not enough? A little further you do another one. So you tighten all the "spans". After that, you can begin to “pull” the grid, tying it to a stretched wire.
If you weld “ears” at the top of the column - a metal bar with holes, the wire can be attached to them. Pulling a piece of 2-3 meters is easier, but the work is slower.
You can also use special wire tensioners. Then, having fixed the wire on one pole, on the second it is passed into such a device as in the photo. It is fastened in a clamp, and then with the help of a key, the excess is wound onto the drum.
You can use a cable and lanyards - hooks with tie-clamps (in the rigging store). On one side, a cable is twisted around the pole, secured with a clamp. On the other hand, a lanyard is placed. Its middle part is threaded, so you can pull the cable.
A lanyard with a cable is another option.
Since the cable is more flexible, it can be passed through the links. Each one will be too long, after two or three cells - it's normal. One more thing: take a cable with a polymer sheath: it will not rust.
With welded wire
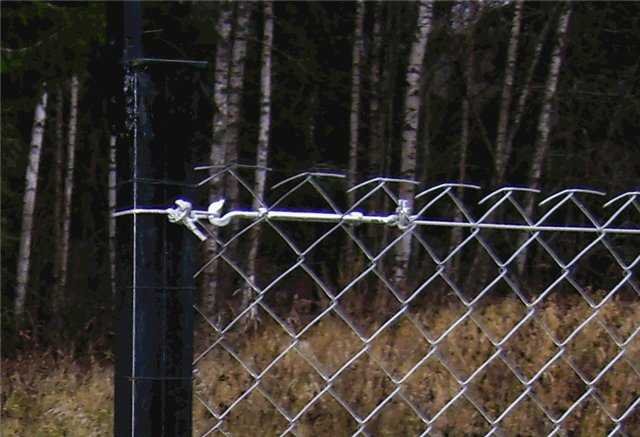
A steel bar with a diameter of 6-8 mm is threaded into the upper cell, or slightly lower. It is cut into pieces equal to the distance from one pillar to another. The threaded rod is welded to the pole.
Pay attention to the top of this chain-link. In this photo, you can clearly see that it has already begun to bloom. This is exactly the reason why it is necessary to take a mesh with curved ends. It just doesn’t unravel, and even without a wire or a bar, it holds the edge well.
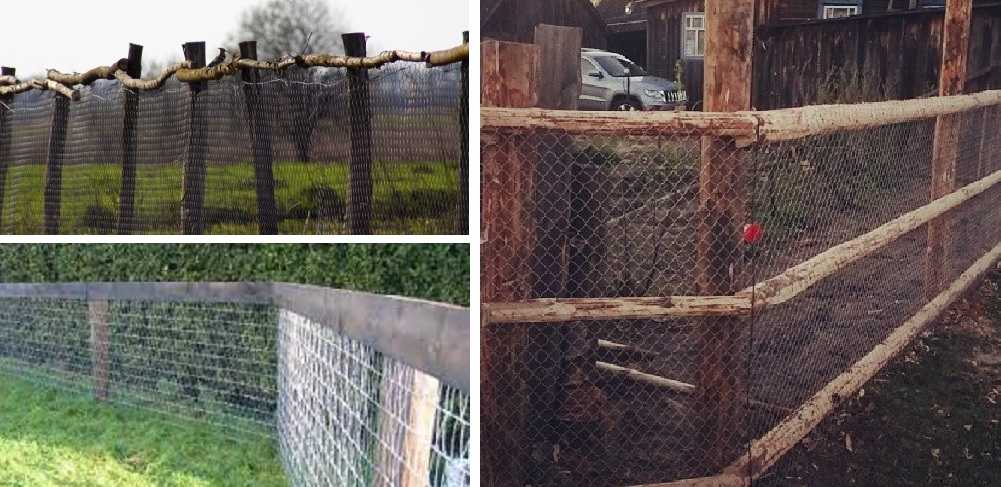
With slugs (guides)
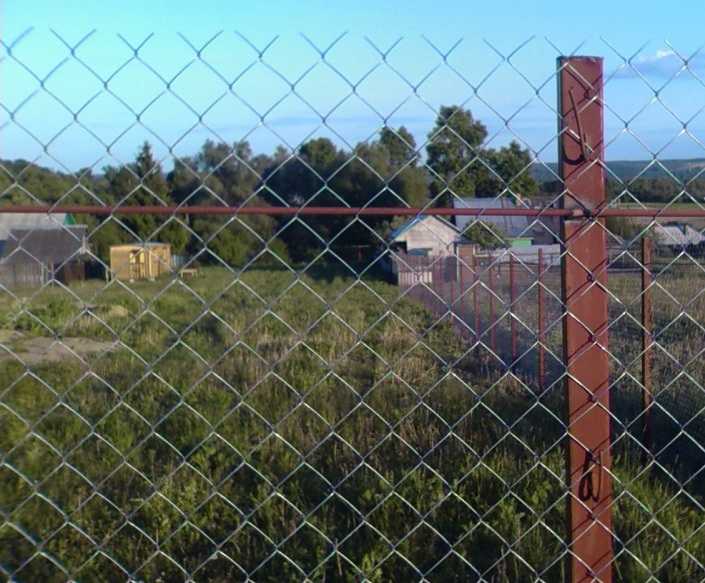
In even more rigid structures, after the pillars are installed, slugs are welded to them. These are cross pipes or wooden planks attached between posts. There may be one guide, or there may be two or three.
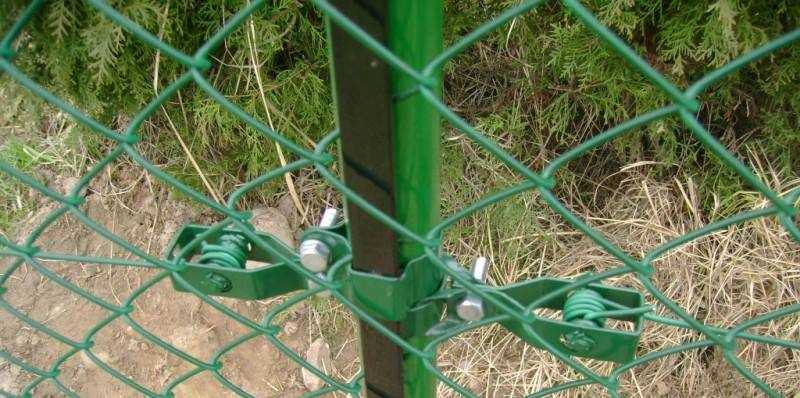
As you can see in the photo, in this case, you can also fasten the mesh with a wire. Obviously, all methods described above can be used. The only difference is that the mesh is attached not only vertically, but also horizontally. The photo below shows another way - with plates bolted, the ends riveted. This method can also be used when attaching to poles.
Chain link fence decoration
No matter how pleased you are with the fence at first, after a while there is a desire to either decorate it, or make it less transparent in order to close from prying eyes.
The first way - the most obvious - is to plant plants. If the neighbors do not mind, bindweeds or any other annual or perennial plants can be used.
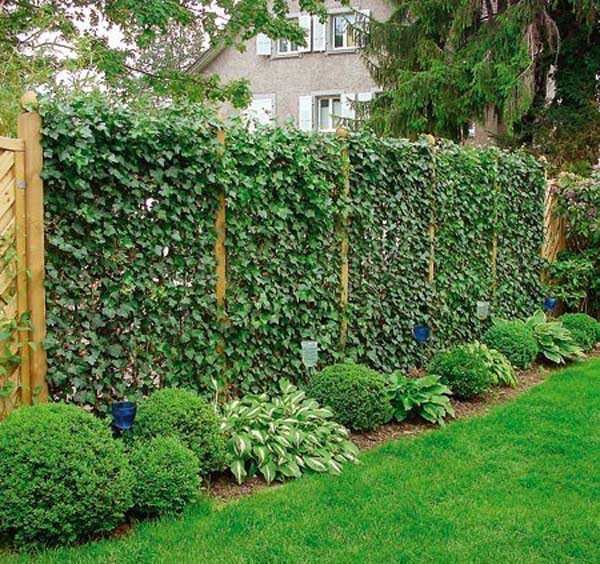
The most natural way is to plant plants
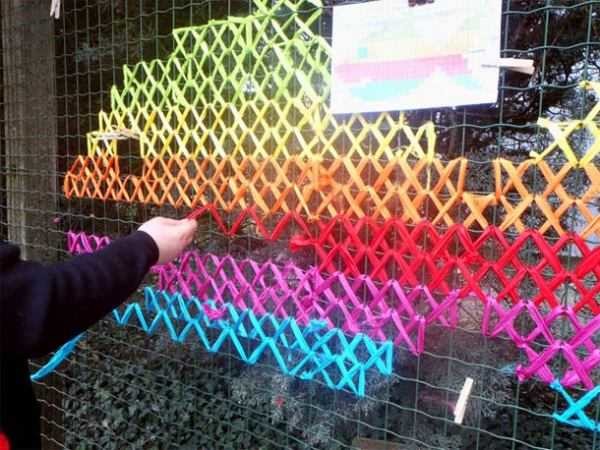
If you just want to decorate your fence, you can do "embroidery". The cells are the same size, so you can embroider like on a canvas. There are two materials for embroidery: wire and colored twine.
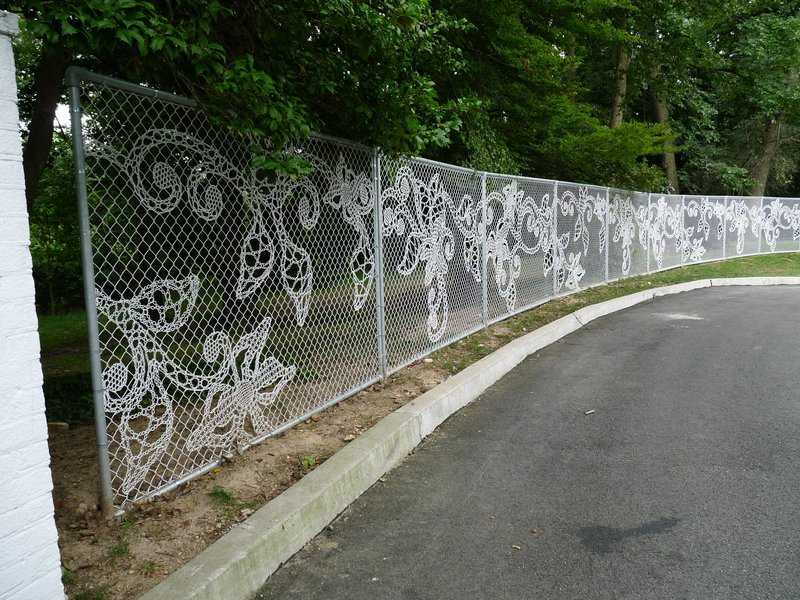
Colored twine is good because you can "embroider" color pictures. Any that seem appropriate to you.

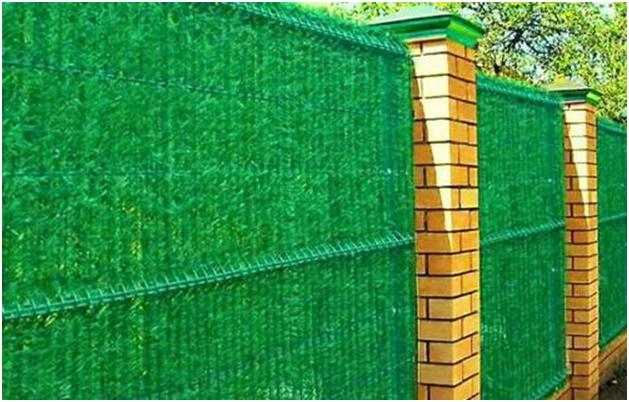
Not a very aesthetic, but quite effective way is to stretch a camouflage or shading net. These methods are good because they require a minimum of effort: they pulled it, grabbed it in a couple of places.
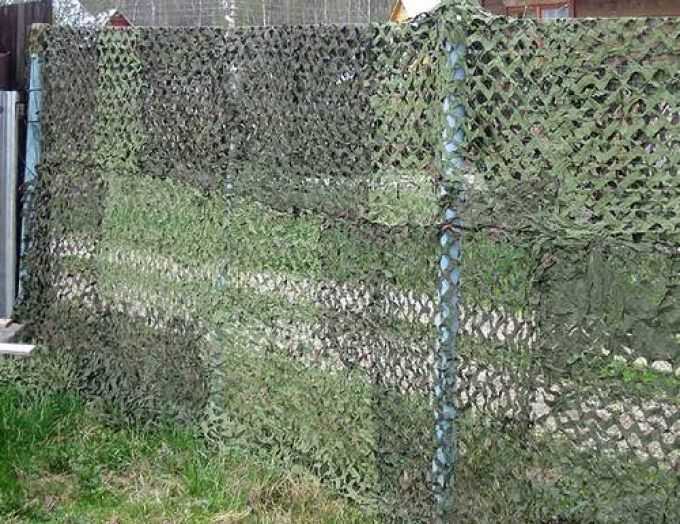
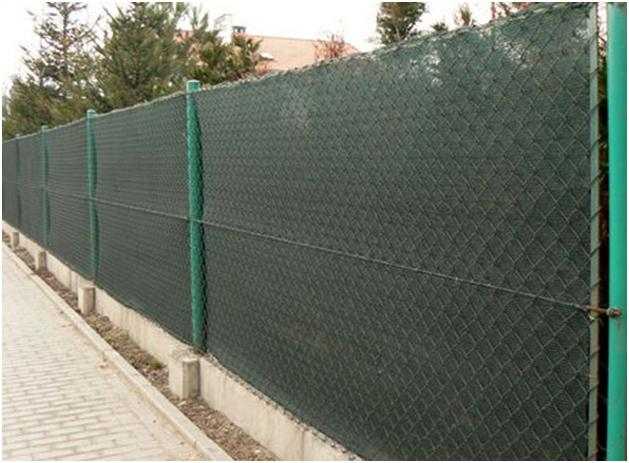
The shading mesh is almost opaque and the wind load will hardly change
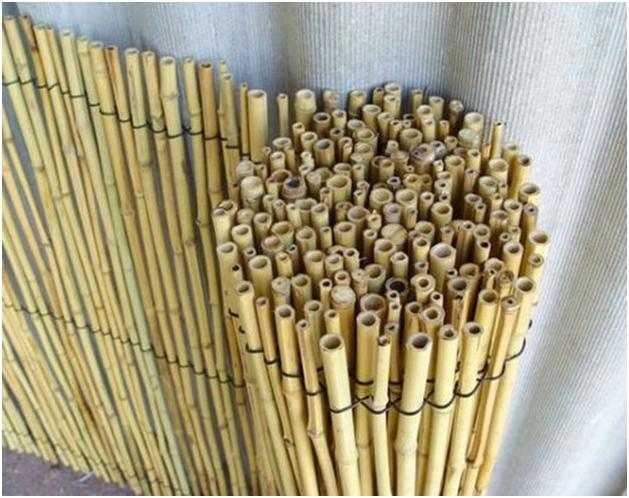
The same effect is achieved if twigs or reeds are woven into the cells. The disadvantage of this option is the high labor intensity. It will take a lot of time.
Ready-made reed mats can reduce manufacturing costs. They are sold in rolls. All you need to do is unroll and fasten. But the cost is much higher than the previous option.
Another way is to use artificial needles sold in rolls. It is used in the manufacture of baskets and wreaths, but it can also be adapted to the fence.
Green wall - chain-link mesh decorated with artificial needles
Not so long ago, another way of decorating and, at the same time, reducing the visibility of a fence from a chain-link mesh appeared - a photo grid. This is a pattern printed on a polymer mesh. Sold in rolls (for tension fence) or fragments (for sectional). It is fastened with the help of eyelets and wire or clamps built into the surface. You can see an example of the effect in the photo below.
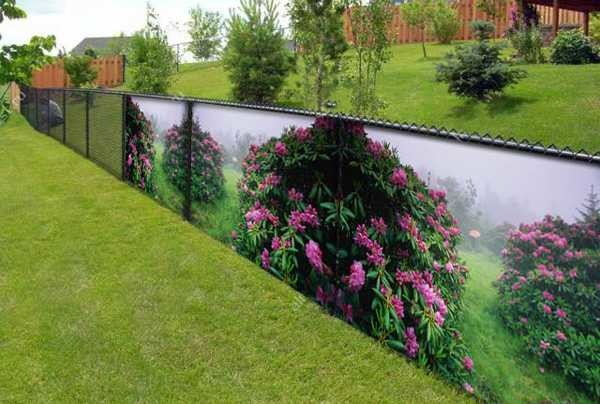
From the chain-link mesh and decorate the fence, and close the area from prying eyes