Did you know that the installation of a stone, slate or fence from metal products between adjacent summer cottages is prohibited? The fact is that the deaf high fences shadow a lot of space, preventing the penetration of light. Given the dimensions of the country sites, 6 to 8 acres, where every meter on the account, all plants planted along such fences will be root and wrap. Therefore, the complaints of neighbors are inevitable. What to do? A good option is to equip the fence from the chain grid. It will not prevent the penetration of sunlight and the movement of air masses. Such fences are popular not only among summer houses, but also used to protect technical zones, sports grounds, lakes and other reservoirs, peasants and other objects.
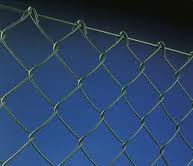
Rabitz He received its name in honor of Karl Charles Bricklayer, who issued a patent for her invention at the end of the 19th century. True, then it was used to shock the walls. The chain grid is a wire from low carbon steel, which is woven into a peculiar canvas. Spirals from wire screwed into each other with a special machine, which not only knits the grid, but immediately rolls it into rolls.
On the fence from the grid Rabita price is much lower than on fences from other materials, which is an indisputable advantage. Any dacket or a rural resident can freely purchase a grid in any construction supermarket, a store or on the market, in addition, he will need pillars to secure the grid and reinforcing rods, a cable or thick wire 4 - 6 mm in diameter.
Types of grid Rabitz
To date, there are three types of chain mesh on the market, which differ in the manufacturer:
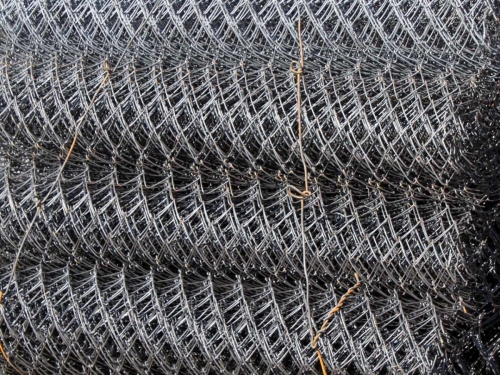
- Neokinated From black wire. An unpainted grid of a chain chain from ferrous metal will last long, not more than 3 years. At the same time, after three to four days after its installation, rust will begin to appear. As a temporary option, such a grid can be purchased with the calculation that later instead of it will be taken out of another material or removed at all. Otherwise, the black metal mesh must necessarily paint and update the colorful layer every 4 to 5 years.
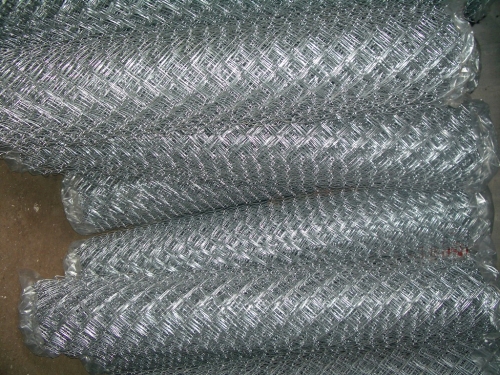
- Galvanized Rabita grid is not corrosion. At the same time, it is not much more expensive than an analogue of ferrous metal. That is why it is widespread popularity.
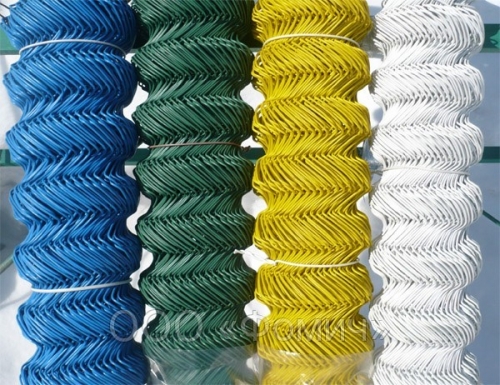
- Plasticized. This is a metal wire mesh, top-covered with a protective anti-corrosion polymer. It looks several aesthetic than previous species and is not afraid of moisture. In our market, such grids appeared relatively recently and have already begun to conquer the country's sections of our compatriots.
In addition to the material manufacturing material, the chain chain may differ in the form of cells and their size. Shape, rectangular, diamond or other, does not matter much. But the size of the cell is extremely important. It can be from 25 mm to 60 mm. What it is less, the less the grid passes light, more durable and monolithic, but also expensive. The grid with cells of 60 mm is not suitable for the fencing of the chicken coop, as the cells are large enough, so that chickens so that they climbed. Therefore, choose a chain grid is necessary at the rate of which it will be used. For the fence of the country area, so that large animals and people can not penetrate, use a grid with cells 40 - 50 mm. This is quite enough.
The cost of the fence from the chain grid depends on several parameters: mesh material, cell size, wire thickness in the grid and the method of its fastening.
Non-scattered chain grid with dimensions 50 * 2.0 * 10 costs about 28 USD. For a roll of 10 m. In these dimensions 50 - the size of the cell, 2.0 - the thickness of the wire. By the way, it can be from 1.0 to 2.0 mm. Accordingly, the thinner - the cheaper and easier the grid, but less durable and durable.
Galvanized chain grid 50 * 2.0 * 10 costs 32 USD For 10 m. Agree, the difference is not so great.
Plasticized grid Rabita 50 * 2.0 * 10 costs 48 cu For 10 m. It is somewhat more expensive than previous options, for temporary fence it will be assigned, and for permanent - just right.
How can you make a fence from the chain grid
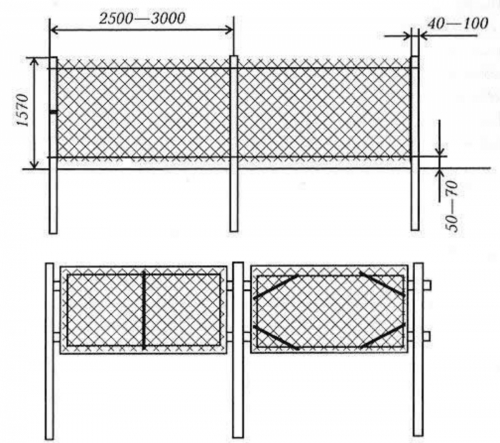
There are two ways to arrange a fence from the Rabita grid:
- Stretch between columns;
- Make sections from the corner to secure the grid fragments.
The first way is much easier and cheaper, but less aesthetic and in some way practical.
For the manufacture of sections, additional considerable costs of a metal corner will be required, the cost of which can exceed the cost of the grid. Sectional fence will be more stronger, stronger, it will be possible to dry anything on it or just hang.
For both ways, there will be pillars to which the grid will be attached.
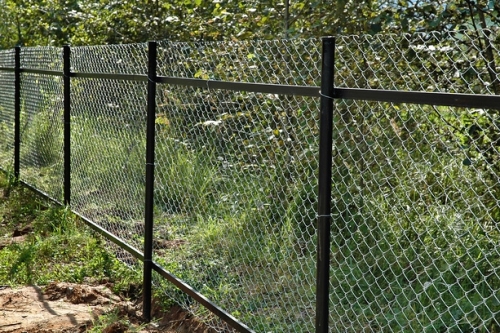
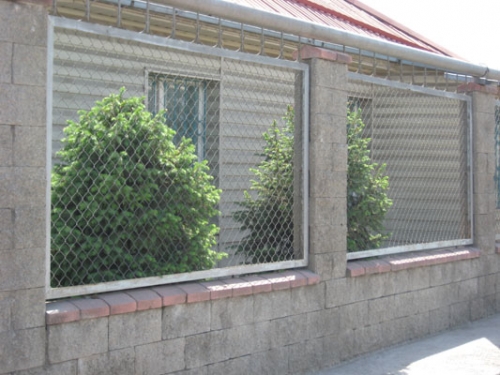
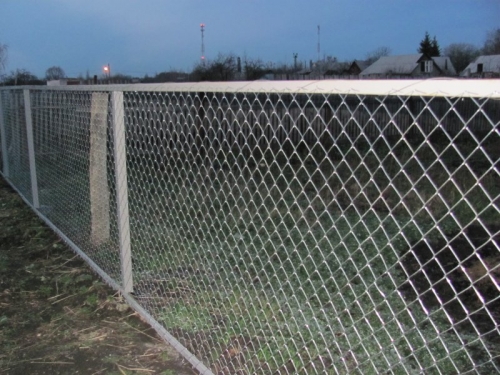
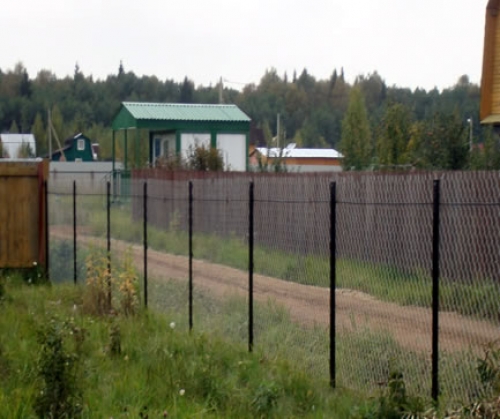
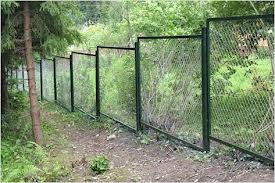
What are the fences from the grid Rabita: photos - examples


Poles for the fence from the chain grid
Wooden poles - Easy accessible material in wooded terrain, but short-lived. It makes sense to acquire wooden rods or bars only if they are much cheaper than metal, or you mount a temporary fence. There are situations where wooden building materials remains after the construction of the house, for example, roofs. I do not want to endure excess costs if there is an inconsolable material.
For the arrangement of pillars under the fence, wooden bars should be necessarily cleaned of the crust. Then they are cut to the required length. Most often, the blowout is performed on 10 - 15 cm below the level of primerization of the soil. So it turns out that the length of the timber will be about 3 m. The entire underground part of the tree must be treated with waterproofing mastic. Fortunately, now the market offers many variations of mastics that do not need to warm up or somehow prepare, just smeared and that's it. The rest of the bars must be painted, otherwise they are rotated already six months later - a year after installation. Fastening the grid Rabita to the tree is produced using nails. From modern materials you can offer clamps, but they will not be too organically fit into the general appearance.
Metal poles More preferable, since more durable and more reliable. Most often use pipes of round or square diameter of 60 - 120 mm. The thickness of the cross section should be at least 2 mm. To reduce the cost of building a fence from the grid, a chain chain pipe can be purchased in the nearest scooter of scrap metal. Sometimes there you can pick up a good version of water pipes that have lost hermeticity, but not affected by rust. For water supply it is impossible to use them, and for the fence, their tightness does not matter. Recently, pillars have appeared on sale, already ready for use for the construction of the fence. They are painted with welded hooks. Such pipes will cost somewhat more expensive, but there are many concomitant worries.
You can also use concrete or asbian pillarsIf they are in stock, but they can only be attached to the grid only with clamps or by the cable, it is inserted into the grid and the woodland pole.
Stretch fence from the chain grid do it yourself
One of the main advantages of fences from the grid is the simplicity of installation, which can be successfully completed together without having serious construction skills. As an example, consider the construction of a tensioning fence from the chain grid using metal columns. Mesh width - 2 m.
Market marking for fence
First of all in the corners of the site, we install temporary pegs and stretch the construction thread or cord between them. We measure the length of the cord - it will be the chain grid length, which should be purchased with a margin of 1 to 2 meters, just in case.
Now you need to mark the place to install the columns. The most optimal distance between the columns 2 is 2.5 m, not more, since the chain grid is the bending material.
To calculate the number of necessary pillars, the length of each side of the site is divided by 2.5. For example, the length is 47 m. None of 2, no 2.5 value is just divisible. When divided by 2.5, we get 18.8. We have two ways. The first is to set 19 pillars at an equal distance from each other, 47/19 \u003d 2.47 m. But to calculate the place of installation of the post with such accuracy is practically unrealistic. The second way is to install 18 pillars at a distance of 2.5 m, and between the latter make a slightly smaller distance. Total we need to purchase 19 metal pipes.
On the stretched line, we make a mark at a distance of 2.5 m from each other. Constantly watch them to be on a flat line.
Important! If the site has a significant slope, to build a fence from the grid Rabita will not work, as it is badly attached in a slanting position. The only way out of the situation is to terrace the site. At the scene of the height difference, install a more powerful and long post, to which the grid section will be attached on one side, and on the other hand, on the other. For this, the grid can be divided. The second option is to equip a sectional fence.
Installing columns
In places marked under the posts, the borehole bore or the coupling shovel. The depth of 1.2 is 1.5 m. To the posts do not move during the spring swelling of the soil, they must be set below the depth of the primer of the soil at 15 - 20 cm, i.e. At a depth of 0.8 - 1.2 m.
We are the first to install the angular pillars, as they will have the greatest pressure, and even uneven. At the bottom of the wells we fall asleep layer of rubble and thoroughly tamper. Then the layer of sand and also tamper.
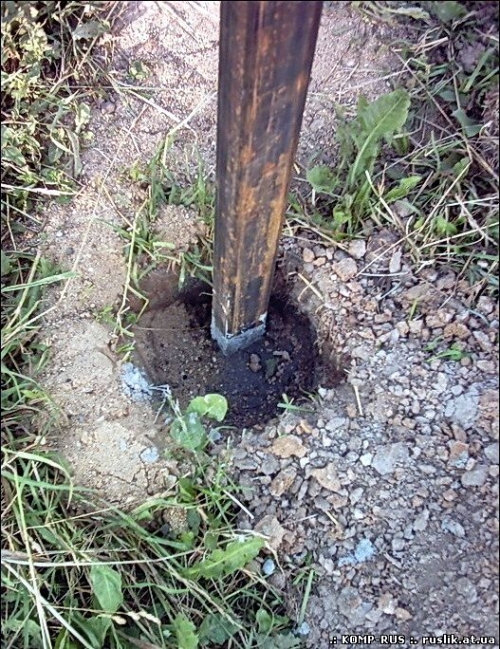
Then we install the pipe, after processing the underground part of the anti-corrosion mastic. We prepare cement mortar from one part of sand and two parts of cement. Mix, then add two parts of the rubble and mix again, pour water and interfere again. It is important to monitor that the solution is not too liquid. Then pour the solution into the hole around the pipe.
Important! Be sure to control the vertical position of the post layout using a plumb.
A bayonet shovel of the concrete, stupid and sealing it. The second in the account set the corner post from the opposite side. Then all other pillars according to the described technology, necessarily controlling the evenness of their location relative to each other. To do this, we stretch the thread - on it and check.
Further work can be continued only after complete solidification of concrete, i.e. in a week.
Sometimes metal poles are not concreted, but simply fall asleep in the empty space of the pit layer of the boob stone or savage, thoroughly tram, then fall asleep the soil layer, also tram, and the brown stone is again. This method of consolidation is also good, the pillars are fixed in adjacent planes. In the last layer of stone, you can add a bit of concrete, it will increase the strength of the structure.
Stretching the chain mesh and fixing on the pillars
When the concrete dry, weld the hooks on the poles, for which we will mount the chain mesh. To do this, you can use nails, screws, thick wire, pieces of rods or other primary material that can be beaten into the hook.
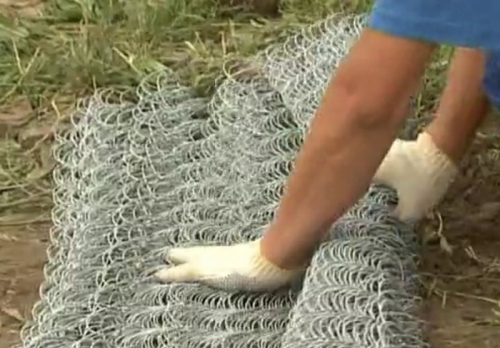
The next stage of making a fence from the chain grid is to pull the grid. First, straighten the roll. Then set it near the first corner post. Fix the grid to hook it. For greater strength in the first row of mesh cells (in a vertical position), we produce a thick wire or a reinforcement rod with a cross section 3 - 4 mm. After hanging the grid on the hooks, we weld this rod to the pipe. It will not allow the grid to do and fake.
Cut the grid to one span to the nearest post. Slightly on the place of connecting the grid with the post. We produce a rod in a vertical position into it. Holding for him, we will pull the grid. If we just pull it with your hands, the tension will be uneven. Together, one closer to the upper edge, the other - to the bottom, stretch the grid. For convenience, you can invite the third participant in the process that will wear the grid on the hooks at this time.
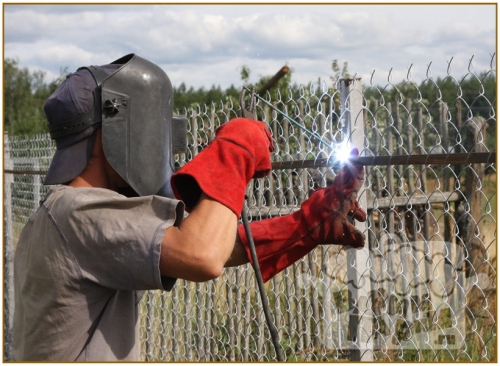
Then we produce the rods, cable or wire into the grid in the horizontal plane at a distance of 5 - 20 cm from the top edge and also from the bottom. Sometimes they advise to use 5 rods at an equal distance from each other. We weld them to the post. Data of the rods will serve as a grid supporting support so that it does not sane over time.
We repeat the procedure for all other columns, acting on the same algorithm: stretch, fix it, stretch the rod, weld.
Important! Do not walk the corner poles with a grid. It is better to fix it on the post, disconnect, fasten the cells of the second part of the canvas and continue to pull the grid already separately. It is necessary in order to reduce the load on the pillars.
One roll rumble may not be enough to close all the spans between the columns. There may be such a situation that the mesh meter remained, and until the next post 2.5 m. In this case, we take out the wire from the extreme row of the wire, we apply the ending canvas to a new roll and crowded wire between them. As a result, a solid mesh without seams should be obtained.
When the entire area is fenced with a fence, bend the hooks on all pillars. If a piece of unailed grid remained, remove the wire, selecting the grid by retreating one cell after fixing on the post.
The last barcode must be painted so that they do not undergo corrosion. If you do not plan to use welding, and fix the grid with a clamp or wire, then you can paint the pillars before the start of the grid tightening.
The top mustache of the wire, from which the grid is made, twist among themselves on one or two turns and wrap down so that they do not injure anyone. Sometimes the cable or wire or wire and wire are tightened to the top row of cells and the mustache wire is spinning around it. On this, our fence from the grid Rabita is ready.
Sectional fence from the chain grid do it yourself
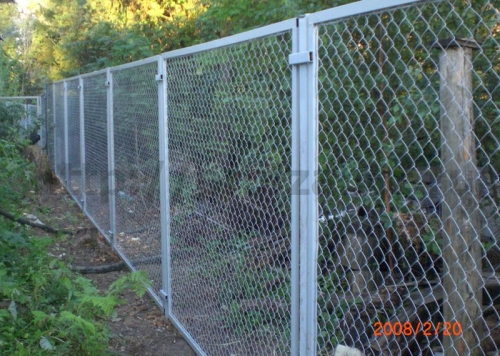
A similar device for the fence from the chain grid differs from the susceptible presence of a framework of sections in which the grid is mounted.
The first stages of the work: the markup and the installation of the posts are no different from the arrangement of the tensioning fence. Poles must be slightly stronger, since they will have to carry a significantly laload.
Acquire a corner of 30 * 4 or 40 * 5 mm. From it we weld the frame for the fence sections. For this, from the distance between the columns, take 10 - 20 cm, it will be the length of the frame. From the height of the pillar over the ground level, we are taking 10 - 15 cm, it will be a frame width. Welding corners in the form of a rectangle.
Then we unwind the roller grid roll. If necessary, reduce its size in altitude to the necessary, cutting off the excess grog. The second option is to make the size of the section - 2 m (on the width of the grid) and turn the grid roll in a vertical position, disconnecting below.
In the extreme range, we produce a rod with a cross section of 4 - 5 mm. We weld it to the vertical frame of the frame from the corners. Then we produce the rods into the upper and lower row of the grids, thoroughly stretch it and also weld the rods to the horizontal corners of the frame. We also do with the latest vertical counter. As a result, we should get a section cooked from a corner, inside which is welded on the rod rods.
To the columns weld metal strips 15 - 30 cm long, 5 cm wide and 5 mm cross section in a horizontal position. From the upper and lower edge of the post, we retreat 20 - 30 cm. We set the section between the columns and weld it to the bands.
After all welding works, the fence must be painted - everything is ready.
As you can see, make a fence from the chain grid is not so difficult. We will need patience, two are three people and a good mood. And if the description of the word installation technology is not clear, we suggest looking at a visual video.