Rabita grid is a practical material that is ideal for creating fences, especially by land. This is due to its strength, lack of shadow from fence and simplicity of installation. Today we will look at the nuances of the challenge grid, as well as the main issues related to its technology.
Types of Rabit Mesh
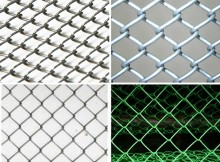
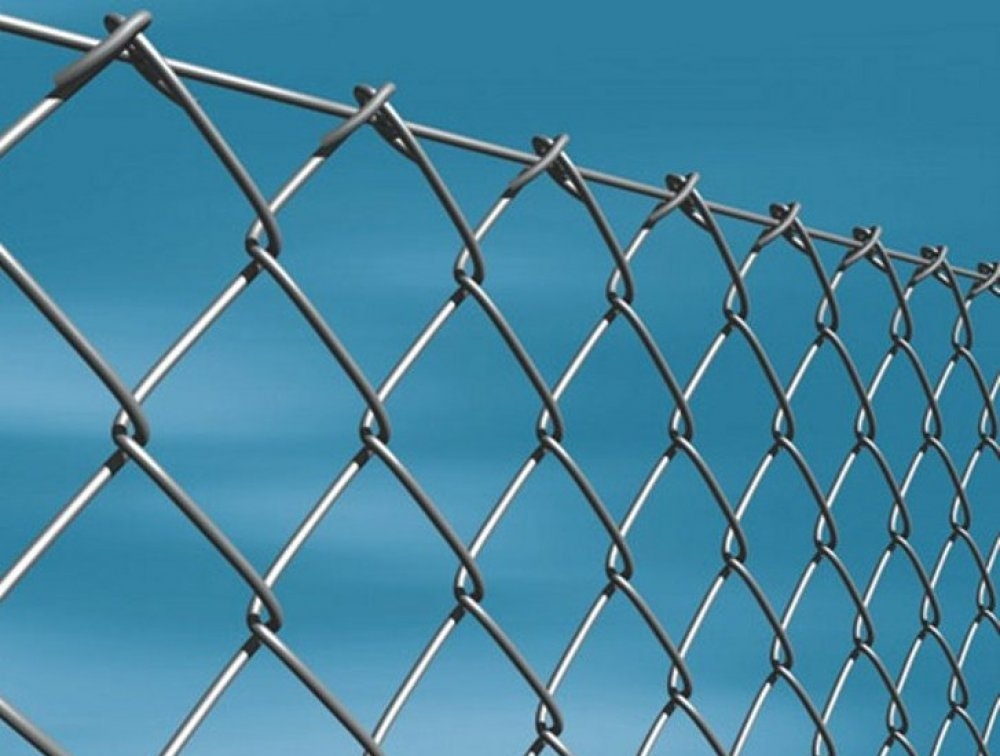
Plasticized chain gridThe strength of the fence, its appearance and cost will be directly dependent on what type of grid you choose. There are three main varieties of chain nets:
- plasticized;
- black neoscake;
- galvanized.
The plasticized grid is covered with a polymer protective layer, which extends the service life of the material, making it more resistant to corrosion. In addition, this coating is distinguished by a variety of colors, so that the grid fence can be chosen to the roof or the facade of the house.
Non-scattered or, as it is also called, a black chain grid is the most inexpensive variety. But she has a significant drawback - a small service life (3-4 years) due to rapid rust. For longer operation, the grid will be required to regularly paint or process water-repellent compositions.
A galvanized chain chain tolerates high humidity, not rust and, unlike a black grid, does not need regular painting. However, its price is significantly higher.
 The size and shape of the cells may be different
 Also, the grid may have a different form of cells and their size. The form is not affected by anything other than the appearance, but on the sizes of the cells when choosing attention should be paid. They can vary from 2.5 to 6 cm, and the smaller the cell, the stronger the fence will be. Accordingly, the price of a fine grid will be higher.
To determine this parameter, you need to consider the purpose of the fence. For example, for the construction of a chart for small pets and birds, it is better to use a small grid, and a large-scale material is suitable for the sings of a country area or cottage.
How can you make a fence from the chain grid
You can make a fence from the chain grid in two ways - to make from the chain and a corner of the section and then connect them either to fix the grid between pre-installed support pillars.
In the second case, the cost of the fence will succeed below and its installation will be easier, but in appearance such a fence is inferior to the sectional. The first option is more beautiful and durable, but will require additional costs for purchasing angle for sections. Below we will look at both ways, but before that it is worth dealing with what supports for the grid fence is better to use, because in any of the options without them it is not necessary.
Poles for the fence from the chain grid
When installing the chain grid, wooden or metal supports are usually used. The wood pillars are less durable, and their use is justified, only if it is possible to purchase material inexpensive, and the fence itself will be temporary.
Before starting work, wooden supports should be carefully cleaned from the crust and cut to the required length. It is usually plunged below the level of soil freezing by 15 cm. The underground part of the columns must be soaked in waterproofing, and the rest of the surface is painted, it will allow to extend the service life of the fence. The grid to such supports is usually fixed with nails or special clamps.
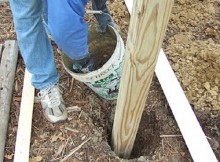 Installing wooden supports for fence
 Pillars made of metal in mind their durability are used more often. Standardly for these purposes, round or square pipes with a cross section of 6-12 cm are acquired, and the thickness of their walls should be 2 mm or more. If you have an acute question of saving, it is possible to buy pipes in the scooter of scrap metal, although not new, but strong enough products without corrosion traces.
Those who are not constrained in funds can purchase ready-made supports designed specifically for mounted grid. They are already painted and equipped with fastening hooks.
Alternatively, metal and wood can be used by concrete supports. However, in this case, it will have to face difficulties in the installation of the chain, as it will be able to fasten it only with the help of special brackets or woven into the grid of cables, and this is not very convenient.
Stretch fence from challenges
The secret of reliable and durable fence is not only in the use of high-quality materials, but also in compliance with the technological moments of its assembly. Consider how to make a fence from the chain grid, fixing it between metal supports. The width of the mesh installed in our example is 2 m.
Installation of such a fence will not require considerable effort and even two people can cope with it. For this, it is not necessary to possess construction skills, the main thing is to accommodately approach each of the stages of work.
Market marking for fence
The conservation of the fence begins with the designation of its contour. For this, in the corners of the site, tags (small wooden or metal pegs) are driven and connected with a cord or rope. Then you need to measure the length of the rope - it will be the necessary Mesh Metage. But when buying, it is desirable to take the material with the allowance of several meters
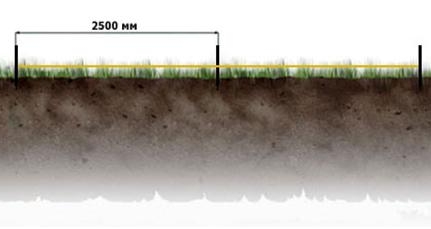 Need to make the markup of the site driven pegs
 It is necessary to take into account that it is possible to build a fencing from the tension grid-slave only on a relatively level plot, since it is problematic to fix it in the inclined position. If there is a significant slope, then the only output will be the terracement. To do this, at the junction of different heights will have to install a pillar (stronger and long than the rest), to which from different sides and at different levels will be attached to the parts of the grid.
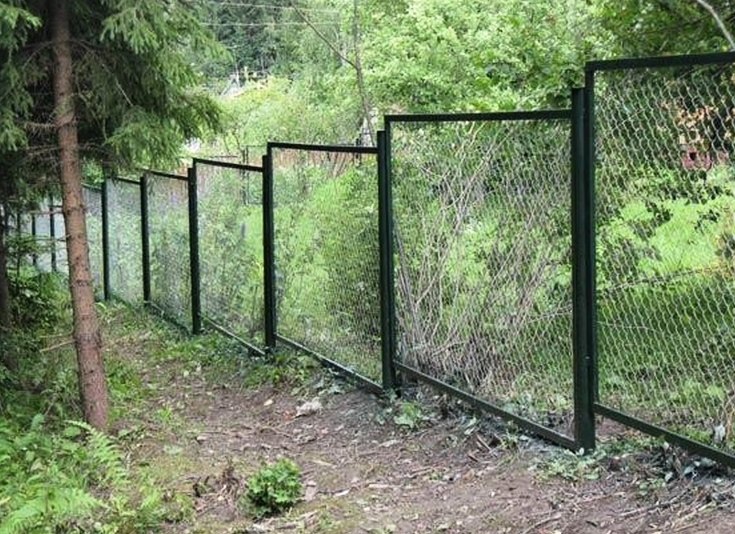 At high drops of heights more rational to make a sectional fence
 Installing columns
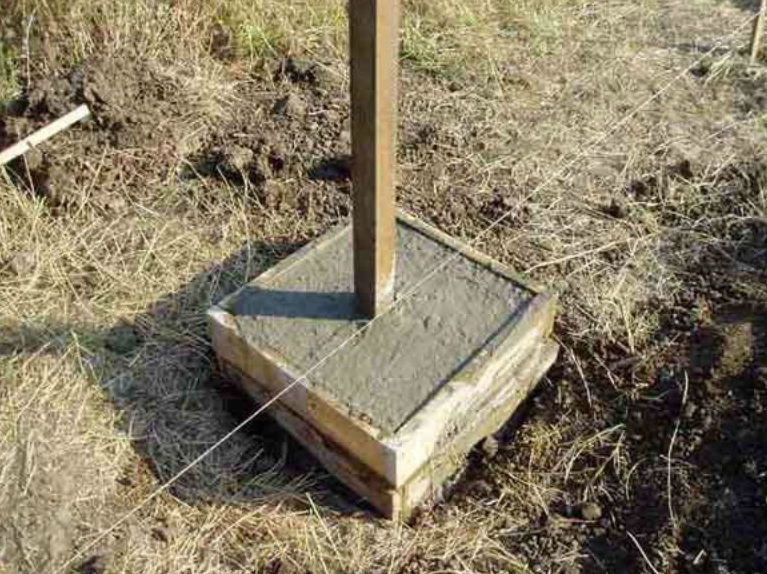
In the outlined places you need to dig the pits under the support pillars. Optimum depth of wells - 120 cm. Installation should be started with corner supports, which account for the greatest pressure.
The first thing on the bottom of the holes are embanked by the layers of rubble and sand, each of which is carefully tumped. Then the lower part of the pipes is processed by the anti-corrosion composition, the supports are installed in the wells and poured with concrete. The solution is mixed from one part of the sand and two parts of rubble and cement. The amount of water is added so that the mixture is not very liquid.
Note! When installing the supports, it is necessary to check their verticality using a construction level.
Concrete around the support pillars should flow a bayonet shovel several times so that it complains. After angular supports, all remaining are installed in the same way, while their location to avoid distortions, you need to control the tensioned cord.
 Control the location of the supports, focusing on the cord
 You can move to the installation of the mesh, only waiting for the complete pouring of the concrete, it will take about 7 days. If you do not want to wait, when strengthening columns, you can do without the use of the solution. To do this, in the free space in the pits, the layer of butte stone falls asleep, they are torn, then laying the soil layer on top and tram. The final barcode is another stone layer. This method, as well as concrete, gives a fear sufficient stability.
Tightening the grid and fixing on the poles
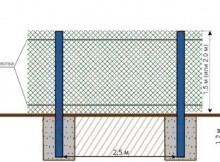 Scheme of tension fence
 If you have acquired conventional pipes, and not special supports, already equipped with hooks, then after drying the foundation it will be necessary to jar on the fasteners. They can serve nails, trimming durable wires and other similar materials that can be bent in the form of a hook.
Next, the mesh mounting turn arises. Stretching the challenges start with the first corner support, tapped the grid on the hooks. So that it does not be bombed, a metal rod with a cross section of at least 3 mm is inserted into the first row of cells and weld it to the post.
Then the grid is wound on, until the next support. For uniform tension, it is better to hold it better for the reinforcement rod, which has been vertically produced in cells. Distribute the mesh along the support is more convenient together, so that one participant follows the upper edge, and the other is behind the lower. If there is an opportunity, it is worth attracting another person to the case, which will be in parallel to put on the challenge on the hooks.
Strengthen the fence welded to the ponds in the top and the bottom is better throughout its length, it will save the grid from sagging. For high fence, you can also welcome several rigidity rigs in the center.
Tip! Corner supports are not necessary to bypass the single web mesh, it should be cut and secured each of the parts separately. This will reduce the load affecting the poles.
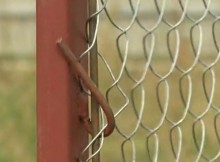 Fastening hooks should be hooked
 If you have a mesh roll in the middle of the span during work, you can remove the wire challenge from the extreme rod, to apply the cloth to the new and connect them, it is intertwined between them. At the same time, you will get a solid cloth without seams.
After the entire grid around the perimeter of the site is deployed, you need to bend fasteners on the supports. If there is an unnecessary residue of the material, it is necessary to retreat on one cell from the fixed edge and cut off the surplus.
The final barcode is the painting of the pillars of the finished fence. If you have chosen to the fence of a non-scattered chapter, then you should cover paint and it. Wire mustache, which will remain at the top edge of the grid, it is desirable to twist among themselves in several turns and bend down so that no one is injured about them. The fence is ready.
 Example of registration of the upper edge of the fence
 Sectional fence from the chain grid
The device of a sectional fence from the Rabita also deserves a separate consideration. The main difference between this design from the previous one - the presence of separate frame sections on which the grid is fixed.
All preparatory work and installation technology of the supports are similar to those described above, but the pillars are recommended to choose more durable, since they will have to retain greater weight.
For a frame, you will need to purchase a corner with a wall thickness of at least 4-5 mm. The sizes of the frame are defined as follows - from the distance between the support pillars and the pillar height above the ground level, 10-15 cm. The resulting parameters will be equal to the length and width of each section.
Corners are connected using a right corner welding to each other, so that the rectangle formed the required size is formed.
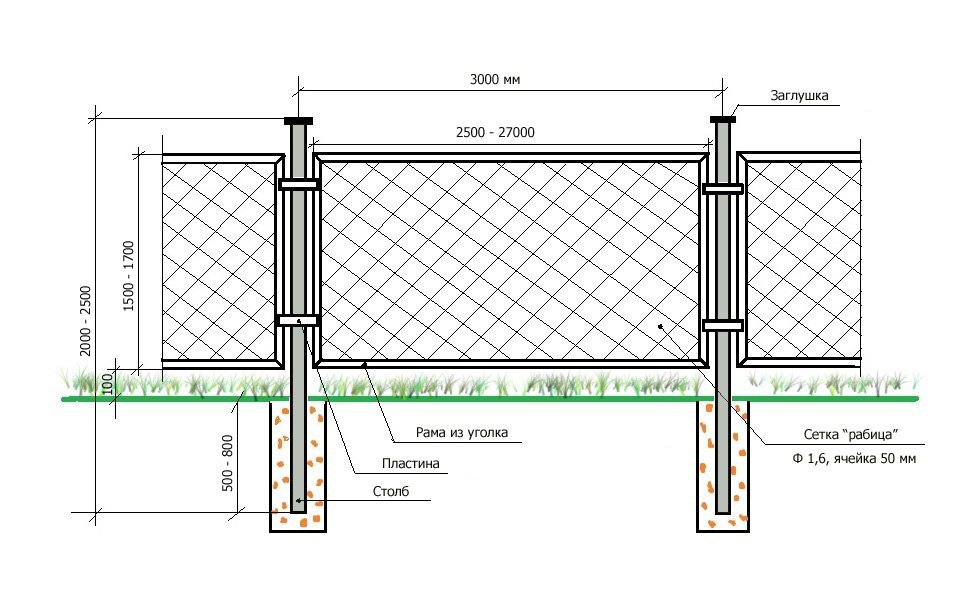 Scheme of sectional fence from grid-slave
 Next, straighten the roller roll. If its dimensions do not correspond to the frame, the excess can be cut off with a grinder. To secure the grid, in all edges of the fragment you need to insert reinforcing rods, and then cook them with a frame. Thus, you should have a section of four fragments of a corner, inside which the grid is welded on the rods.
For fixing sections on supports, small metal strips are fixed to the columns. The optimal length for them is from 15 to 30 cm, the width is about 5 cm and the thickness is 5 mm. The bands are welded in a horizontal position, retreating about 20 cm from both edges of the supports. The sections are then placed between pillars and weld with stripes. Ready fence is recommended to paint.
 The result of work is a solid fence for your site.
 Summing up, it can be said that the independent erection of the fence from the chain grid is an easy task that can almost everyone. You will need only a couple of assistants, materials and the right attitude. Good job!