When designing the fence of the cottage or country house, many real estate owners choose a fence from the chain grid. For this there are logical justifications. This construction, the basis of which is a light wire mesh, is ideal for the fencing of a plot, garden or garden.
1
Installing the fence from the grid allows you to designate the boundaries of your site immediately after it is purchased. In order to build a fence from the chain grid, there is no need to attract heavy construction techniques and hired workers. Set the fence of this type is quite hand.
In most cases, dacha fences are made from this material. Cottage is a place that is visited quite rarely. Based on this, the installation of a capital type fence is unprofitable, since its price will far exceed the value of the property that is in the house.
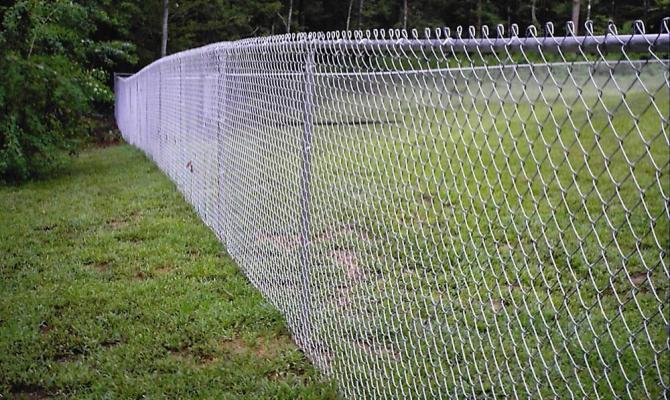
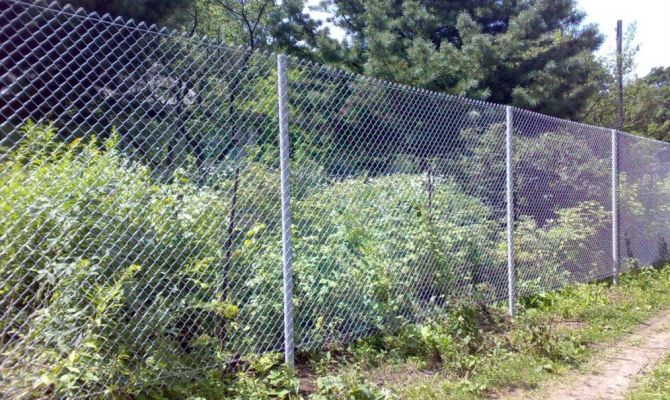
Raby grid fence
The fence from the chain grid has such undoubted advantages:
- Affordable price. The cost of component parts for the fence is quite small. This allows you to establish a fencing of a large length without special costs.
- Easy installation. Set the fencing of this type in the pure field, without electricity and complex equipment. Quite ordinary home instruments.
- Speed \u200b\u200binstallation. In contrast to the construction of capital fences, the installation of a fence from the grid Rabita is carried out within a few days.
- Fencing freely skips sunlight. This allows planting plants in close proximity to the fence.
- Visual ease. Wire fence practically does not create a visual obstacle to observe the environment. This allows you to create a feeling of unity with nature, get rid of the effect of closed space.
- The possibility of combining with berry shrubs or flowers. Such combinations are quite spectacular and practical.
- Ease of maintenance, repair or replacement. A spoiled wire can be removed in the trunk of a passenger machine to receive scrap metal.
The advantages of this design
The durability of the fence directly depends on the material from which it is manufactured.
2
The device of the fence from the grid is pretty simple. It consists of a grid and supports. Before putting a fence from the grid, you need to decide on the choice of its component parts. The main part of the fence is the grid. It is made of steel wire. Produced in rolls with a length of 10 m and a width of 150 cm.
By options, you can purchase the mesh of the following types:
- Unprocessed. It is a conventional black wire. It has the smallest cost. The service life of such a product is no more than 10 years. You can protect material from corrosion using staining or processing with special compositions. This procedure is rather long and cost.
- Galvanized. The fence from such material is immunity to corrosion. However, due to the constant friction, which occurs during the deformation of the fence, the zinc spray is abruptly. After 3-4 years, there is a need for regular processing of grid from corrosion. Partial painting will be necessary every 2-3 years.
- Plasticized. These types of mesh have a polymer wire spraying. Polyvinyl chloride is used as a coating. This material is immune to the temperature difference, humidity and ultraviolet. PVC is resistant to mechanical stress and abrasion. Catering fences from a plasticized mesh may chase decades. You can find products for a variety of colors.

Galvanized grid in rolls
Large importance for strength, durability and aesthetic fences have supports.
Building a fence from the chain grid can be made using supports from such a material as:
- round pipes;
- steel profile;
- reinforced concrete poles;
- wooden racks.
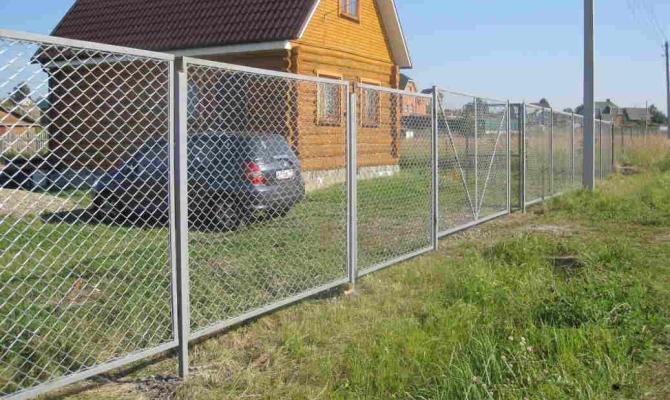
Steel profile fence
The most acceptable and convenient option is considered to use a steel profile of a square or rectangular section. This configuration is better suited for fastening the wire.
Manufacturers make prepared for the use of support with welded straps and hooks.
This somewhat increases their cost, but significantly reduces the time for the construction of the fence. So, we build a fence.
3
Before making a fence from a wire mesh, you need to decide with the method of fixing the supports.
There are two ways:
- Concreting. It is applied in places with ordinary and weak soil. This method is quite lengthy, but gives a guarantee of the strength of the fastening of the supports.
- Baby. It is used where the soil is rocky or has a greater density. As a rule, it serves to quickly install temporary fences.
Since the fence around the cottage should have a long time, the choice is made towards concreting.
Concreting support
To work will require such tools and materials as:
- manual, electric or motor drill;
- building level;
- roulette;
- bulgarian;
- welding machine;
- wire wire or steel corner;
- painting brush;
- bayonet shovel;
- soviet shovel;
- steel supports;
- rabitz;
- paint;
- ingredients for concrete solution (cement, sand, crushed stone);
- tracer cord.
The rolling or corner is acquired depending on which the fence is planned, stretching or sectional. Sectionable much stronger. Stretched fencing is cheaper and faster in the installation.
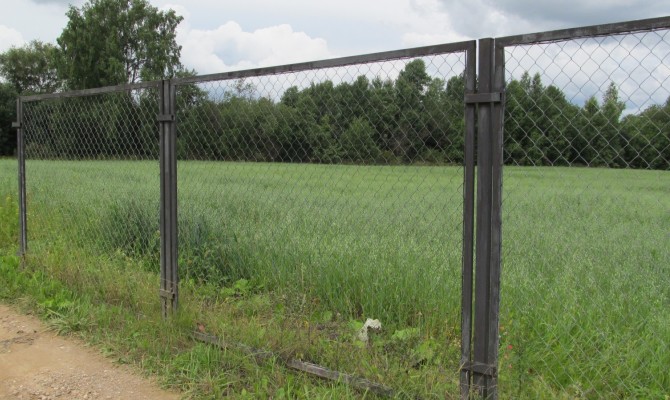
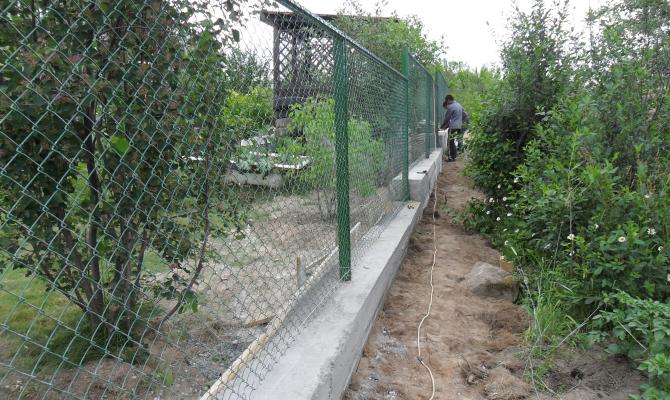
Sectional type of fence
After all the property is prepared, you can start work.
It begins the manufacture of fire tracing, where it will be installed. For this, cord and stakes are used. Considering that one roll has a length of 10 m, then the distance between the columns is taken 2 m or 2.5 m. It should not do more distance, as the woven sagging will arise.
Thus, to find out how much the wire mesh need, you need to share the total length of the track by 10. It is possible to obtain the required number of supports by sharing the length of the track by 2 or 2.5. In places where pits will be marked. After the markup, practical works begin.
4
Since the supports will experience the load from the weight of the wire mesh and wind, they must be firmly fixed in the ground. Depending on its density, the depth of the yam varies from 60 cm to 120 cm. Pits can be digging a shovel or brown. As this event is quite time consuming, it is advisable to rent or buy a garden bur. Such an acquisition will be worth it, since the need for the manufacture of pits in the private sector is always. Pits should be made with a diameter of 2-3 times more than the diameter of the supports.

Drilling holes for supports
After the holes under the pillars are made, such manipulations are carried out:
- poles are prepared for installation (cleaned from rust, ground and sneaked);
- the bottom of the pit is well trambed and falling asleep with a layer of sand;
- sand is richly wetted by water;
- the supports are lowered into the pits, aligned and are rigidly fixed with the struts from the broken brick or stone;
- corner supports are strengthened with disclosures;
- the level of installed pillars in height and their adjustment are checked;
- a concrete solution is poured into the hole;
- after the fill, air is removed from the solution with steel rod.
![]()
Installing columns
On support from steel pipe or rectangular profile, you must install the plugs. It will save support from corrosion and accumulates in them garbage. The optimal option is the inner plugs from PVC. In this way, you can not only isolate the pipes from the inside, but also to decorate them. The installed supports should be at odds at least 3 days so that the concrete gained the necessary strength.
5
After the concrete in the pits froze, the installation of a wire mesh is carried out. Given the specific specifics of this process, it is better to attract assistant.
Installation of wire mesh
Installation is carried out in such a sequence:
- Tensioners are installed on angular supports. Purchase 6 devices for each pillar.
- Measuring the wire of the desired size. As a rule, 3 wire lines are used. This allows you to avoid sagging the grid in the center.
- The carrier wire is inserted into the tensioners and stretches as much as possible.
- Fixing the rods on the support pillars. This is done with wire, hooks or plastic screed.
- The grid roll unfolds.
- Spirals are spiral from above and below. The grid is attached to the wire.
- Steel pins are inserted into the side edges of the grid.
- Pins rigidly attached to the support.
- Mesh spirals are attached to medium guide wire.
After that, you can reflect on how to decorate the finished design. Decor can be diverse. On the fence you can suspend various crafts and lightweight souvenirs in the form of plates.
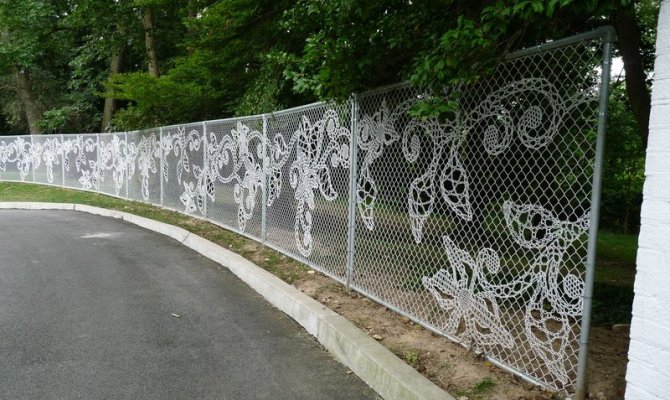
Decorating the fence from the Rabit
Sectional fences are somewhat different. Frames are first manufactured. They are made from steel corner, pipes or timber. Then the mesh is fixed in the frame. This is carried out using reinforcement pins, steel brackets or welding. The next step is to attach sections to the planks on the supports. It is advisable to leave a small lumen between the frame and the earth. It will keep the design from dampness and accumulation of garbage. In conclusion, the whole design is painted.
Fencing from the grid Rabitsa are practical and affordable way to designate their land ownership. Showing a creative approach, you can quickly and cheaply make a beautiful and practical fence that will serve for many years.