We need: laminated cardstock or thick cardboard for jewelry and a base, PVA glue for gluing jewelry, Super-Moment glue, a breadboard knife or paper cutter, a 2H graphite pencil, an eraser, a ruler, a compass, a sheet of paper in a cage or a breadboard mat , figured composters, corner and edge composters, paper butterflies and birds, a stamp with a wish, 2 rhinestones, 1 brads.
1. Let's make the base for the cage in the style of "Chinese lantern". We mark out a sheet of cardstock or cardboard appropriately for making a cage. We make cuts on a paper sheet 25x16 cm in size.There will be 16 strips in total, acting as the rods of the cage. There will be 16 gaps between the rods. Each strip has a width of 0.5 cm, the width of the gap is 1 cm. In addition, we leave 1 cm as an allowance for gluing. Thus, it turns out: 0.5 * 16 + 1 * 16 + 1 \u003d 25 cm.
The height of the rods will be 12 cm.To glue the top of the cage with the ring, we leave an allowance of 0.5 cm.Thus, we cut the paper to a depth of 12.5 cm.The height of the base will be 2.5 cm, for gluing the bottom we leave an allowance of 1 cm. Thus, it turns out: 0.5 + 12 + 2.5 + 1 \u003d 16 cm.
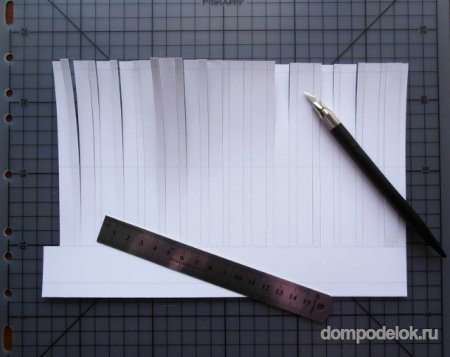
2. Cut out a 25x16 cm rectangle from cardboard.
3. Using a medium-hard pencil and a ruler, mark the horizontal lines of the allowances for gluing the upper part of the cage (0.5 cm), the bottom (1 cm from the bottom edge), the base (3.5 cm from the bottom edge) and the central part of the rods (6 , 5 cm from the top or 9.5 cm from the bottom).
4. Using the cutter, make vertical cuts 12.5 cm long with an interval of 0.5 cm.
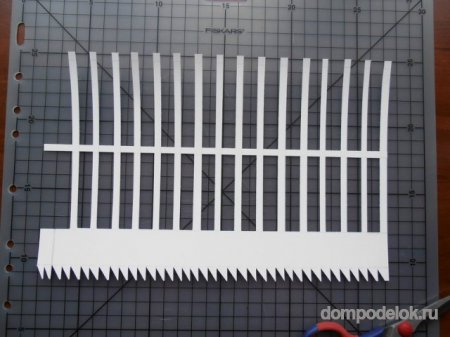
5. Carefully cut the bottom gaps with a cutter.
6. Using a creasing board or a ruler with a stick, mark the seam allowance line on the wrong side of the sheet for gluing the bottom. This will allow for a more beautiful fold.
7. We make incisions 1 cm high for bending: first perpendicular to the base, then obliquely, thus forming teeth. Mark a line for gluing the side part, leaving 1 cm from the edge.
8. To strengthen the structure, glue a strip of cardboard 25 cm long and 0.5 cm wide to the central part of the rods. On the seamy side, the line has already been marked, now we put down small marks along the edges and in the middle of the front side (we will later remove them with an eraser). Gently glue the strip on the front side with transparent glue. No traces of glue should be visible from either side.
9. Bend the teeth inside the cage and glue the base with allowances.
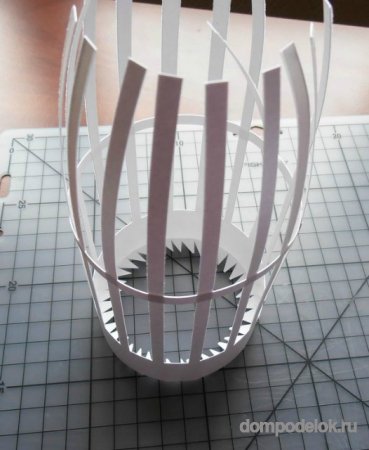
10. For the bottom, you need 2 cardboard circles. The radius of the circle is calculated by the formula L \u003d 2πR. It turns out 3.8 cm.
11. Place the cage on the table, insert the inner circle into it, press it against the teeth, previously greased with glue, using a napkin or tweezers.
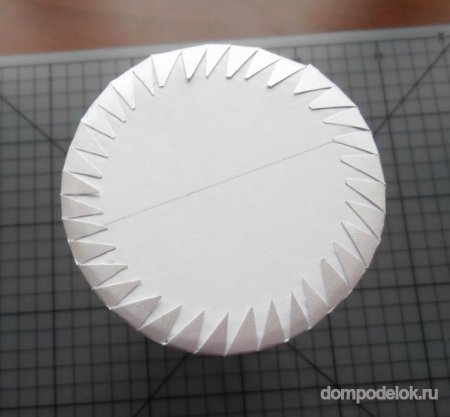
12. Let's start making the base for the upper part. Make a circle with a 2.5 '' composter (equivalent to 3.7 cm). We take a cardboard sheet and fix it on a checkered leaf or on a mock-up rug. We draw 4 pairwise perpendicular lines.

13. Apply marks on the cutting edges of the composter at 90-degree intervals, then cut out a circle with a marked center.
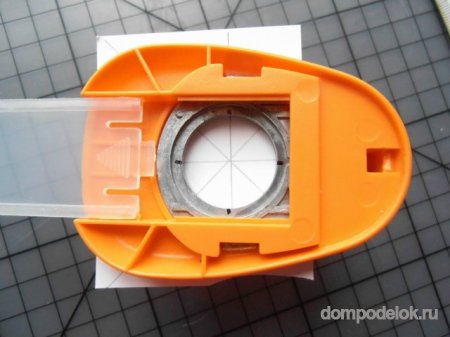
14. Using a compass, mark a circle with a smaller diameter, leaving 0.5 cm for the allowance for gluing the upper part. We make in the middle between the intersecting lines on the circle of the mark. The resulting segments are 22.5 degrees.
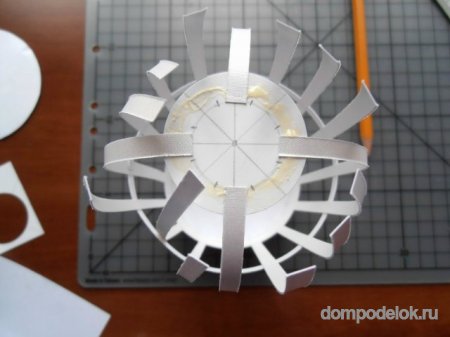
15. Apply elastic rubber glue to the outer edge of the circle and glue strips to it, which are placed opposite each other along the marking lines. Each line is glued strictly in the center of the pencil mark.
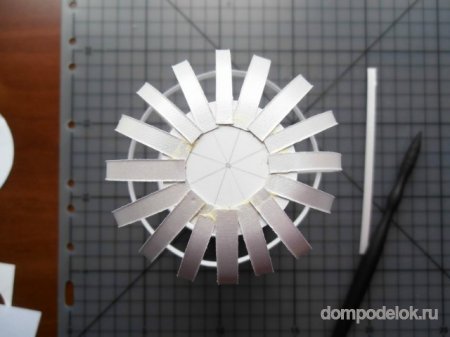
16. After gluing the main strips, apply glue and lay out the remaining strips. If necessary, trim strips if they overlap with other strips. We maintain the geometric accuracy of the strip placement. Since each next strip will be more difficult to glue, we use some kind of tool with a flat end to press the strips under the circle, while pressing them from above with our fingers.
17. As soon as all the strips are glued, close the top of the cell with a circle that has holes in the middle.
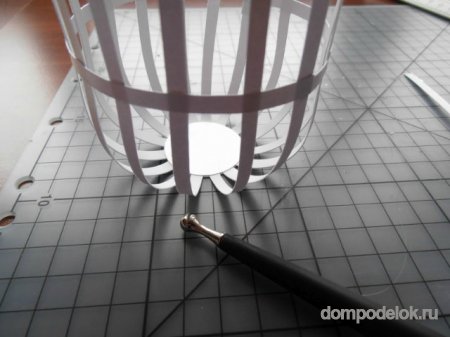
18. Carefully turn the cage over and roll the edges with a ball tool to ensure better fixation of the strips on the cardboard circles. After that, putting the cage on its side on the table and holding the circle on the back with your finger, pierce the top of the cage through and through. The cage is now ready for decoration.
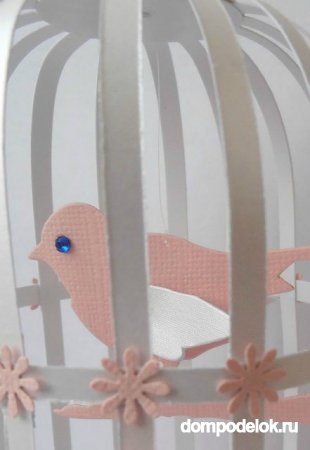
19. On a previously prepared figurine of a bird on both sides, glue the wings and eyes-rhinestones. Form a small hole for transparent fishing line or white sewing thread and draw the line from the inside of the cage to the outer circle. We place the figurine of the bird inside the cage, hang it at a given height, fix the fishing line with glue or tape.
20. Decorate the cage with a paper ring. The ring is glued to several glued and stacked circles with a strip with a fixed brads.
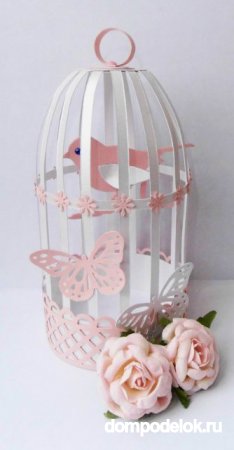
21. The cage can be decorated with various elements, ribbon or paper can be used to decorate the bottom part. The cage is ready.
| An excellent DIY craft "Bird in a cage" will perfectly decorate an apartment or house on New Year's or other holidays. The craft can be done with children from 3 years old. A child over 6 years old can independently make a craft. | |
Materials for craft "Bird in a cage": |
|
 |
1. Colored paper (preferably high density) or not very thick cardboard. 2. For the bottom of the cell, a box of cheese curds (if not, then the bottom can be made yourself from cardboard). 3. Scissors 4. Ruler 5. Pencil 6. Thread, needle 7. Drawn (printed) silhouette of a bird 8. Decorations (optional). |
Step-by-step instructions for crafts: |
|
 |
On a sheet of paper of standard A4 size, we will draw two stripes 2 cm wide for finishing the bottom of the box - a box. Also note 8 lines of 1 cm each, which will become the grid of the cell. |
 |
Cut out. (For a child under 6 years old it is difficult to cut lines exactly 1 cm wide, so it is better for an adult to do this). |
 |
The next step is to make marks on the bottom at regular intervals for gluing the gratings. |
 |
We glue our ready-made 8 "lattices" along the outer rim of the craft bottom. |
 |
On top of them we glue, cut off at the very beginning of the strip 2 cm wide, pasting the bottom of the craft in a circle. |
| Then we cut out the bird (you can print it or draw it yourself) from thin white paper (you can decorate it if you want). We thread a thread with a needle through the bird and sew it on top of the cage with the same thread. (The grates can also be glued together with glue or tape). Craft "Bird in a cage" is ready. |
|
The benefits of this craft with a child:
1. Working with a ruler and pencil. Ability to mark segments of the required width.
2. Cut thin stripes along the lines.
3. Working with a centimeter and measuring the length of the circle.
While it is not difficult for my 5-year-old son to draw lines with a ruler and a pencil, it was quite difficult to cut out the same thin stripes without bends. But the desire to make the craft on his own won and, having trained and spoiled several sheets of paper, the son almost completely mastered the scissors.
The centimeter, as another type of ruler, interested my son very much and then measured all sorts of things with it for a long time. For example, he was interested in measuring the "length" of a large fitball and an ordinary soccer ball, and already, comparing not by eye, but by centimeters, to say which of the balls is larger.
DIY decorative cage
: the master class will be useful for educators, parents, creative people.
Purpose: work for an exhibition of crafts, decoration of the group's interior, a gift for a holiday.
goal: making crafts from waste materials (cardboard from packaging, remnants of tapes, wire).
Tasks:
- to teach how to make a voluminous craft "Bird in a cage"
- learn to use waste material for making crafts (cardboard from packaging, remnants of tapes);
- to form the ability to compose a composition;
- to promote the development of fine motor skills of the fingers, attention, accuracy, creativity, imagination;
- to consolidate the skills of handling scissors;
- bring up accuracy, perseverance
Little bird
Yesterday I dissolved the dungeon
My captive in the air:
I returned the singer to the groves,
I returned freedom to her.
She disappeared drowning
In the glow of a blue day
And so she sang, flying away,
As if praying for me.
Working process.
To complete the craft, we need: thick cardboard, thick wire 2 meters, thin copper wire 15 cm, pliers, round-nose pliers, scissors, compasses, stationery knife, glue gun, various decor: a bird, beads, decorative testicles, leaves from artificial flowers, artificial flowers, narrow satin ribbon.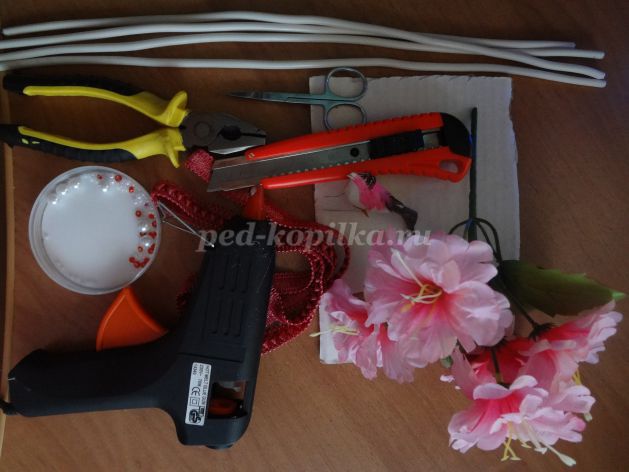
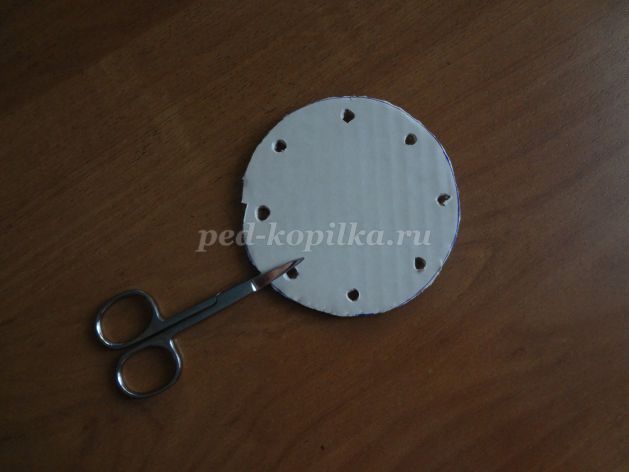
We draw a circle with a diameter of 9 cm on cardboard.

We cut it out and drill holes in the circle with the help of scissors, equal in diameter to the thick wire. We try to drill holes opposite each other and at the same distance from each other.
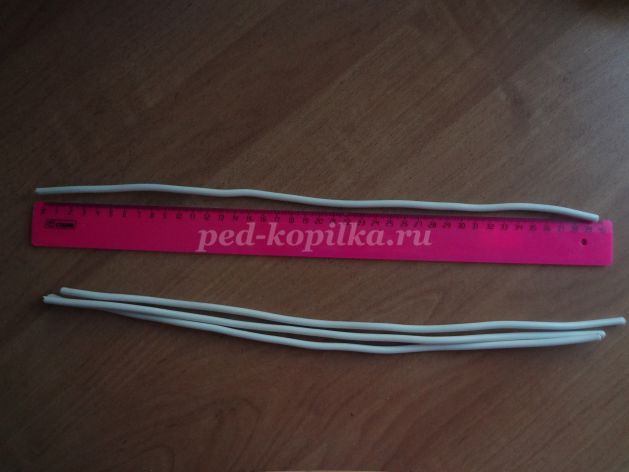
Using pliers and their side cutters, cut a wire 40 cm long 4 pieces.
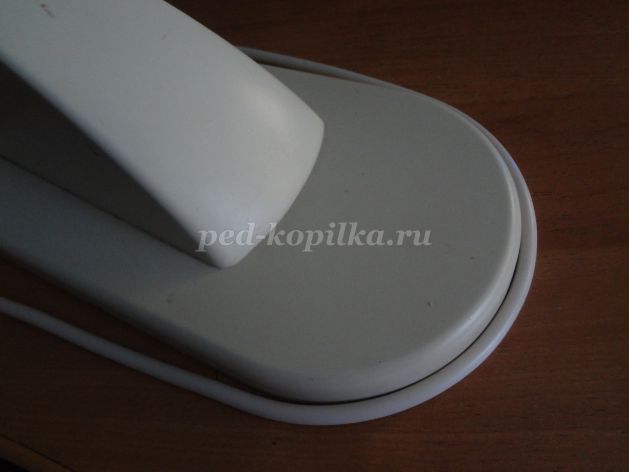
We bend two pieces of wire in the form of an arch, adapting for this some kind of round surface, for example, a plastic ball, in my case the base of a table lamp.
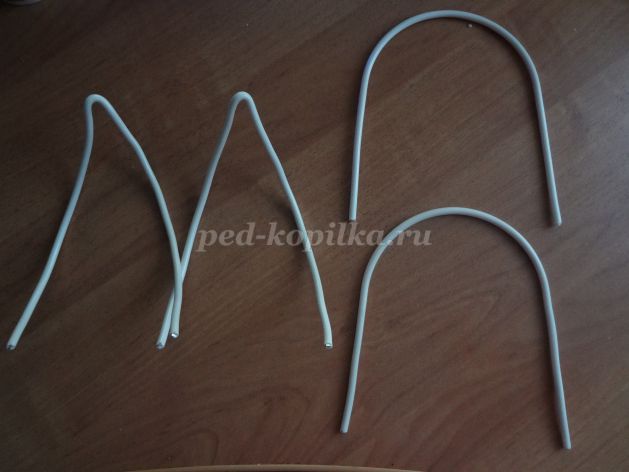
Take two pieces of wire and fold them in half and also give them a rounded shape.
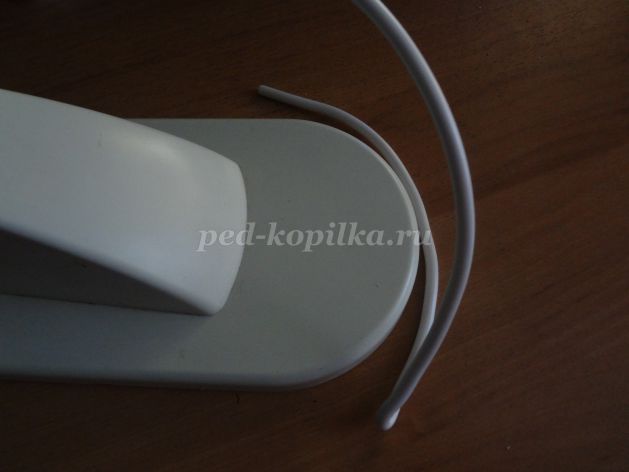
We got blanks for the cage.
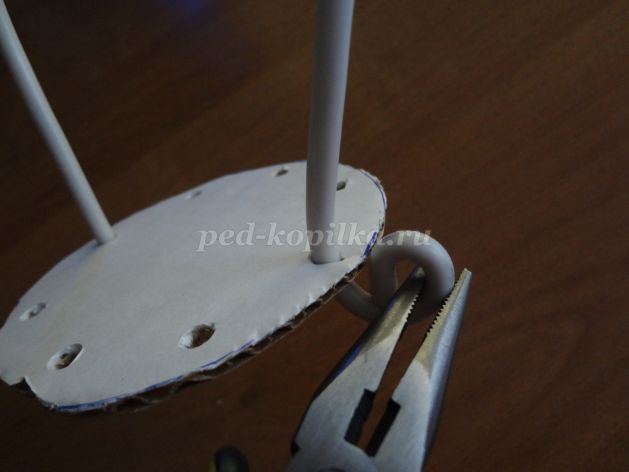
We take the wire bent in the form of an arch and insert it into the holes in the cardboard circle.
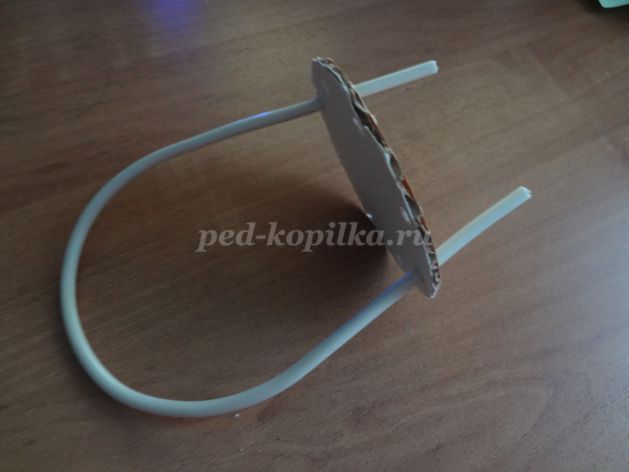
You can leave it that way, or you can bend the ends of the wire using round nose pliers.
Then we insert another wire in the form of an arch into the adjacent holes on the cardboard circle. We also bend the ends of the wire using round nose pliers.

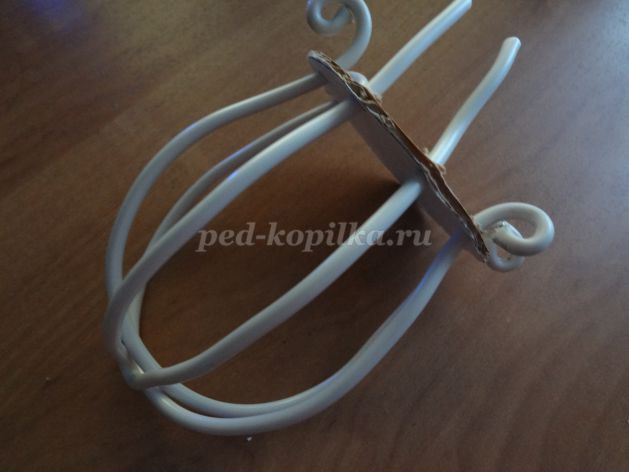
We insert a wire bent in half and rounded on one and the other side of the cage into the adjacent holes.
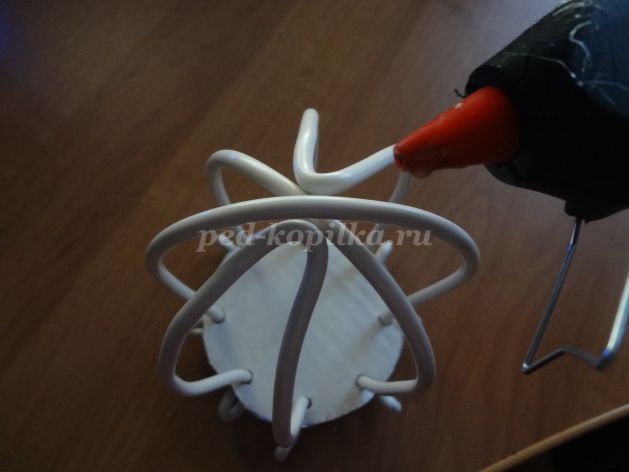
We connect all the parts of the cage at the top and glue them with a glue gun or any other glue, you can also tie all the parts with a thin copper wire.
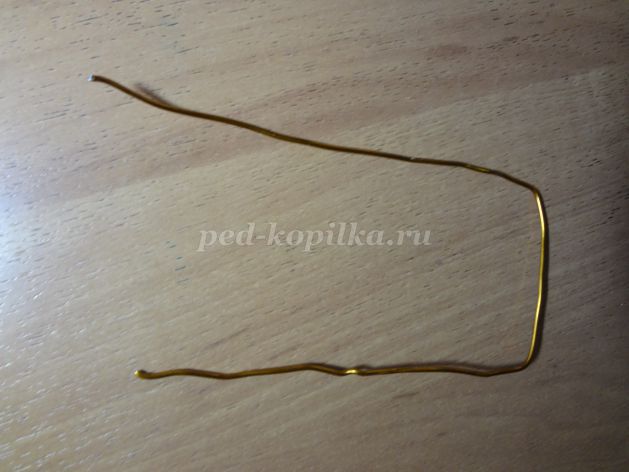
Bend a piece of thin copper wire in the shape of the letter "P"
String (optional) beads on it
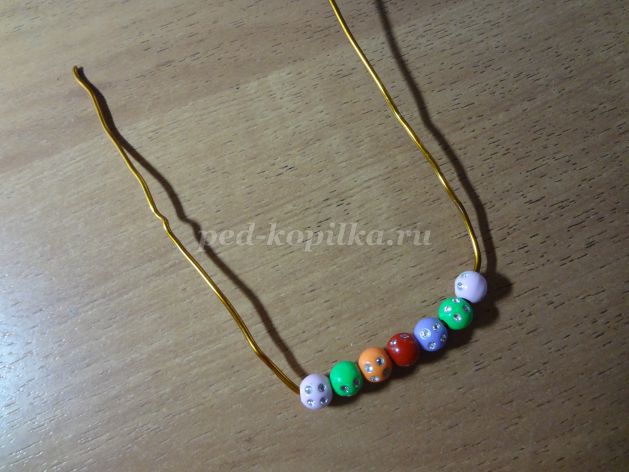
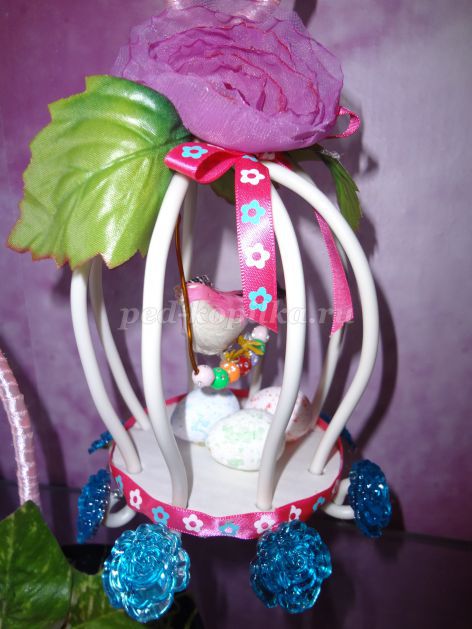
We glue the bird, if there is no foam bird, you can cut it out of cardboard. We fasten the swing with the bird to our cage. Our bird cage is almost complete.

It remains to decorate our cage. You can decorate at your request with various flowers, leaves, decor that you have.
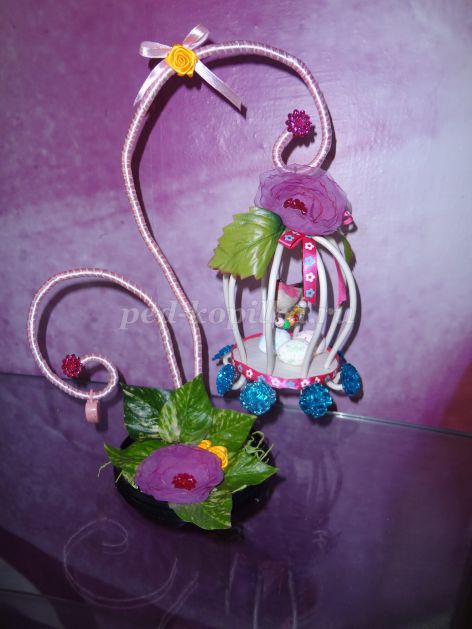
If you wish, you can make a stand for a cage with a bird. For its manufacture, you will need a container from under the disks, if it is not available, replace it with any other plastic container.
Drill a hole in the container and insert the remaining wire, bent at random, and glue it to the stand with a hot gun. Wrap the wire with satin ribbon and decorate the stand with available decor.
It is no secret that all people like beautiful handicrafts, especially those made with their own hands, and not bought in a ready-made store. We buy a lot of materials for needlework, such as colored paper, beads, colored pencils and much more, but the question always arises, what can be done from this?
Today we will make paper birds in a cage, which are ideal both for decorating a children's room and as an original homemade gift for absolutely anyone. Agree, who doesn't love birds?
So, for manufacturing we need:
... bright colored paper of several colors;
... awl or a very small hole punch;
... plastic or cardboard round lids (for example, from packing tennis balls), this will be the diameter of our cage;
... fastening materials, such as: yarn or thick thread, small nails, tape (double-sided required);
... regular scissors, a paper knife is also desirable.
The entire manufacturing process will take about 20 minutes.
1. First of all, we take one sheet of colored paper and cut from it using scissors or a clerical knife four identical narrow long stripes. The strips are about 5 millimeters thick. The length depends on how large the cover you take. For example, if you took the lid from a tennis ball package, the length should be 25-30 centimeters.
2. Using an awl (or a hole punch), we make a small hole in the center each resulting strip.
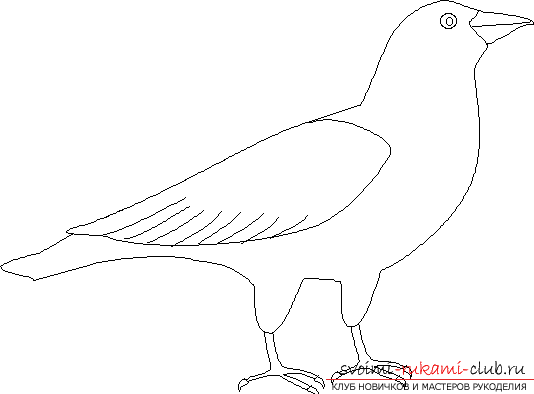
3. From thick paper of a different color (it is also possible from white) or from cardboard we let's make the bird itself... If you don't have dense materials at hand, you can neatly glue several sheets of regular material together. Draw the outline of the desired bird (you can also find it ready on the Internet and print it, and then outline it) on a sheet of paper, then neatly cut out scissors or a utility knife. If desired, this the workpiece can be painted... On the top of the workpiece we make a small center hole.
One of the blanks for printing:
4. We take yarn or dense thread, measure the length of 30-35 centimeters and cut it off. We thread the thread through the hole on our bird, we make a knot at one end. Then we make another knot at a distance of 3-4 centimeters from the tied end. Thus, our the bird should be at one of the ends of the thread, limited by knots on both sides... We thread the other end of the thread through the holes on all four cut strips of paper, stretch them to the knot on the thread, and then fix this structure with a small nail.
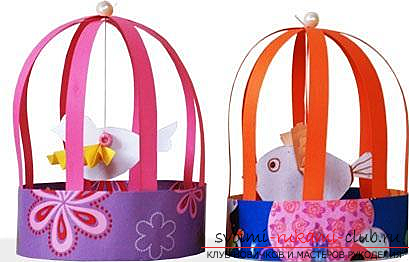
5. The time has come for the lid we have saved. You need her side wrap with double-sided tape... We use a strip of tape about 2-3 centimeters wide, depending on the diameter of the cap. We glue our blank of cut strips onto the scotch tape so that it turned out a cage with a bird inside... Since there are only four strips, respectively, 8 ends will need to be glued. The distance between them is 1/8 of the lid perimeter.
6. From paper of any other color (or from a printed design, gift paper, etc.) cut out a rectangular part... The length should be slightly longer than the side of the lid so that the edges can be held together. You can choose any width you want. The width of the part will be the height of the base of the cage... Then we take this part, as well as the lid, and glue the part onto the adhesive tape already available there on top of the "rods" of the lattice.
Now your cage is ready, and the bird is sitting in it, all that remains is to hang this craft by the free end of the thread!
If you still have time and desire to do something even more original, you can continue the work. Next, we will make a kind of garland.
To do this, do the following:
A) We make several of these cells (you can have different sizes and colors), repeating all the steps described.
B) We take a strong thread, yarn or rope, measure the length sufficient to place a certain number of cells on it (as many as you have made) and with a margin for securing the garland.
IN) We tie each made cell at such a distance that adjacent cells do not touch each other when they are hanging. When tying each cell, we also make knots on the main thread on both sides so that the cells do not roll towards the center.
Thus, our gift has become even more beautiful, original, as well as unique and unforgettable!